


Extend the life of sails with these sail care basics, and chose the best sail types and materials for your cruising style.

High-tech laminate sails may sound appealing, but conventional woven sails remain a better all-round option for cruising
– as long as you take care of them. Understanding sail care basics can also help extend their lifetime.
Although sailcloth technology has advanced significantly in recent years, the basic principles of its manufacture haven’t changed in centuries, with warp fibres (running along the cloth) being bent around fill, or weft, fibres (running across the cloth).
These yarns snake over and under each other (known as ‘crimp’) and when the cloth is put under load, they straighten out, resulting in ‘stretch’.
Most modern woven sails are made from polyester, also called Dacron, originally introduced as a replacement for cotton in the 1950s. Being highly durable and economical, Dacron is ideal for cruising sails.
Spinnakers and cruising chutes, meanwhile, tend to be made from woven nylon which has an excellent weight-to-strength-to-tear ratio.
Sail materials: Cruising laminates
Many people associate laminate sails with high-tech competitive sailing, but cruising laminates are also available for coastal sailing.
Strong, light, but expensive, they are a hybrid of woven and laminate materials with the woven fabric bonded to both sides of the interior laminate to promote durability and UV resistance.
Cruising laminates tend to last for five years. The benefit is that their shape will remain consistent throughout that time.
Chafing challenges
Extended choppy passages at sea can create a good deal of chafe between a boat’s sails and its rigging.
One sail care solution lies with your use of the halyard.
‘Moving the halyard regularly will help ease wear on the same location on both the sail and the halyard,’ explains Jeremy Smart, from North Sails in the UK.
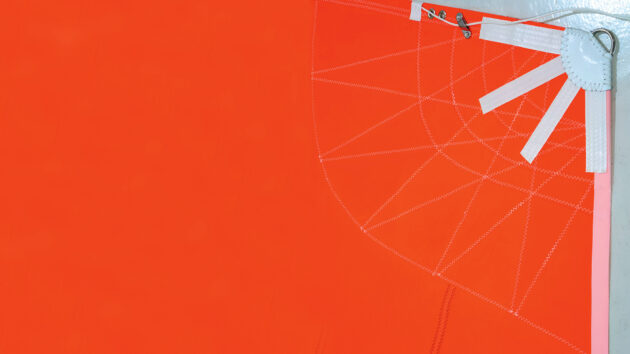
He also advises using spreader patches to protect your sails.
‘Full length spreader patches that run from the sail luff to 7in or 8in beyond the spreader tips are a good idea,’ he says. ‘They are usually made from a durable self-adhesive sailcloth, but they should be sewn down to keep them firmly in place.’
To make an effective spreader patch, wait for a calm day and, with the sail hoisted and eased out onto the spreaders, hoist a crew member aloft to mark the correct locations at the luff and leech ends.
Don’t forget to measure the spreaders as well. This will give you the proper length for your sail patch.
Sail repairs

A roll of Dacron tape and some good adhesive will help with an emergency repair.
Sail repairs are an essential part of sail care. You will need some spare sailcloth that matches the materials you already have, as well as some sticky-backed sailcloth (such as Bainbridge Insignia) to be used anywhere on a sail.
You should also have a sailmaker’s palm and a mix of needles, wax thread and webbing. A roll of Dacron tape is always handy.
You can stick it onto the sail and then, for a wider repair, attach some Insignia cloth, which is a lightweight, adhesive-backed polyester used for insignias, numbers and emergency sail repairs.
Bainbridge also does an offshore sail repair kit that comes with a variety of items including patches, palm, scissors and tape.
It’s also a good idea to have a small sewing machine, some thread and spare needles.
Remember, the repair might be strong enough to get you ashore, but any sticking or hand-stitched repairs will then need to be removed and replaced properly by a sailmaker.
Sail care basics: fixing a tear in your sail
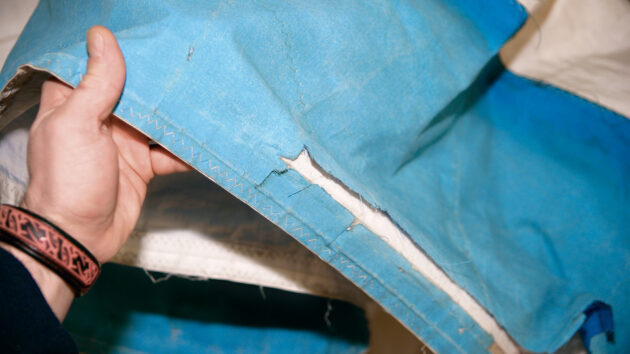
UV strips are particularly prone to deterioration and damage.
A big tear in the body of a sail may look dramatic but it is relatively easy to fix. This technique works on laminate as well as Dacron sails.
Don’t use sail repair tape, PSA adhesive-backed sailcloth is much better than standard sail repair tape and it comes in large areas.
Clean off any salt and dry the sail, then put it on a flat surface – the deck or pontoon.
Cut a large patch with a generous surround as this is where the strength will come from. Round off the corners to prevent peeling.
Don’t sew the patch, as this adds a line of perforations which can weaken an older sail. Only stitch or use other glues as a last resort.
To stick on the patch, peel the backing off one edge, then gradually work the rest of the patch onto the sail, being careful not to introduce any creases. Glue works with heat and pressure, so give it a good hard rub once you’re done and this
will help it to adhere.
Repeat the process on the other side.
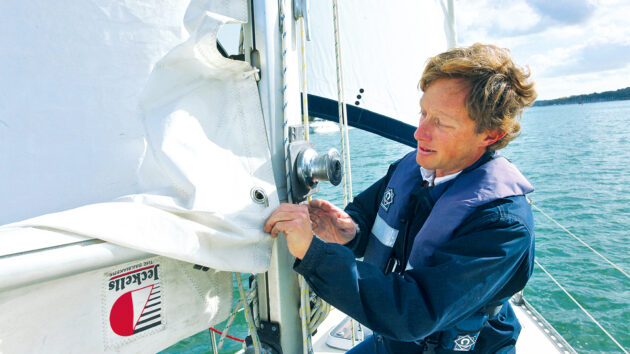
Sail care basics: fixing mast sliders
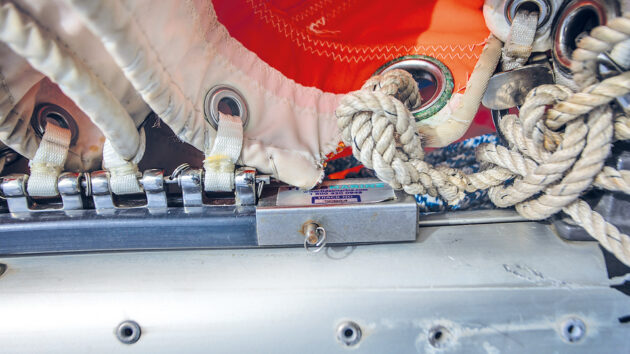
Replacing damaged mast sliders will ensure even stresses across on the mainsail. Photo: Richard Langdon.
It’s easy to break the mast sliders on a mainsail, especially if the kicker gets left on during reefing.
Some boats attach the slider above a reef point with bungee, which can snap rather than damaging the sail or slider.
It’s always a good idea to have spare sliders on board. These can be snapped on with a pair of pliers, or shackled.
Failing that, use some loops of 12mm webbing to sew it on. Make sure the slider has the same stand off the mainsail as the other sliders so that it takes an even amount of load.
Stitch along the side of the loop, not across the middle, so that the slide can articulate fully to stop it jamming.
To finish, tie a loose knot in the thread, then split the end of the thread and pull apart to slide the knot tight.
Cleaning your sails
A mixture of warm water, mild soap and vinegar will cut through most sail staining.
The temptation to simply lob a sail into a large commercial washing machine to spruce it up is always there, but it’s not the best course of action.
Ideally you should take your sail to a professional sail loft for laundering. They tend to charge by weight to do this job, rather than sail area, with the current cost for laundering a typical mainsail found on a 32ft cruising yacht coming in at around £120.
However, if you’re keen to save the money you can do a decent DIY job fairly easily yourself by laying the sail out on a flat non-gritty surface and giving it a light scrub with a soft brush using mild soap (not detergent) and water. A bit of vinegar added to the mix is often recommended.
A warm but very light dilution of domestic bleach (sodium hypochlorite) will help remove the worst stains and any mildew – but, importantly, don’t use a lot of bleach as its powerful oxidising agent (chlorine) can damage sail stitching. Make sure you rinse the bleach off thoroughly with clean water.
Drying both sides of a sail can prove tricky, but the easiest way to do it, of course, is to re-hoist the wet sail on the boat.
It is essential that sails are dried out completely before being put into a bag for storage.
Correcting bias
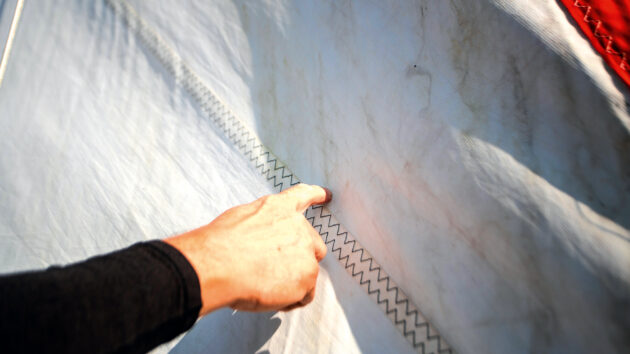
A good sailmaker will quickly identify detrimental stress angles pulling on a sail. Photo: Richard Langdon.
While inspecting your sail a good sailmaker will also be able to assess how the loads in the sail radiate.
This is important because, with so many construction variables, not all of the loads will follow the yarns exactly, meaning that some of the stresses on the sail will be ‘off the threadline’.
To reduce this, the sailmaker will be able to minimise any bias (diagonal stretch) they find in the woven cloth by locking the warp and filling the yarns together using a resin to chemically bond them together.
Vectrans and HMPE
It’s easy to reef a sail in a flat calm in a few minutes, but in the dark, in challenging conditions, when you’re exhausted, it can take a great deal longer.
Meanwhile, the sail will be thrashing around due to distortion caused by any off-thread line loads put into it while reefing.
A Dacron sail is going to hang on in there by being able to handle all the flogging and misuse, and get you home safely.
So, when things do go wrong for you while cruising, you do not want a laminate – it’s asking for trouble.
Dacron sails will, on the whole, do everything you need them to do. Conventional woven Dacrons or hybrid Dacrons that combine modern fibres such as Vectran and high modulus polyethylene (HMPE), commonly known by the trade names Spectra
or Dyneema, are the best choice for long-distance cruising sails.
Because Dacron is a woven fabric, and not laminated, there are no layers to fall apart. Vectrans and HMPE will increase the strength of the woven polyester sailcloth and its overall longevity and durability, as well as increasing its resistance to tearing.
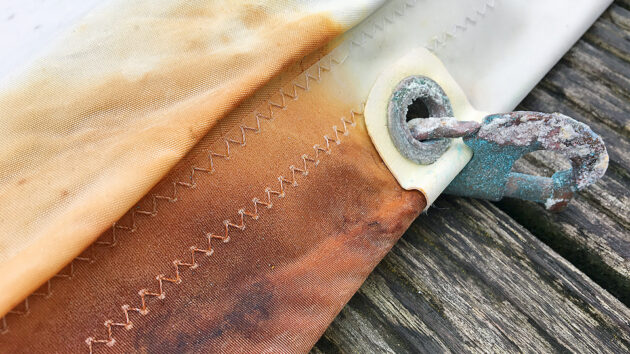
Top sail care tips
Clew stresses can be alleviated with strategic reinforcement.
Ensure you cover areas of chafe with adhesive patches, particularly where battens touch the rig.
Battens can wear through the pocket ends (a plastic pocket end can be bolted through the sail to secure).
Leech line cleats also need replacing occasionally, so carry spares, and bolt rather than rivet them on. A Velcro clew strap can also help take leech loads and prevent tearing.
Choosing sails for an ocean passage
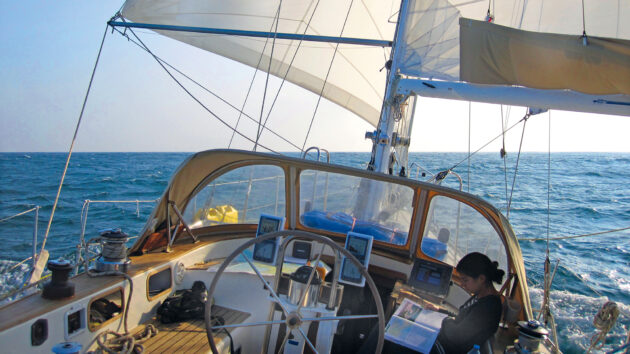
Durable and repairable Dacron sails are best for long-distance cruising.
When considering what sails to take on a long distance bluewater voyage or event, it’s tempting to think that expensive laminate options would be ideal due to their undoubted performance and weight-saving advantages.
However, once you begin your extended passage of possibly thousands of miles, it’s highly likely that you’ll start to realise that a set of good old durable and easily repairable Dacron sails, couple with basic sail care skills, would be a much better choice.
Most sailmakers in remote ocean destinations still haven’t invested in laminate sail technology (such as hot-glue machines, sticky-back Kevlar or carbon-fibre repair material, or ultrasonic tape).
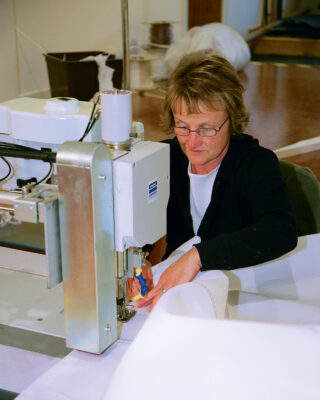
They will, though, certainly have straight stitching machine sewing machines, and will be used to working with fibre-based sailcloths.
When should you replace your sails?
A new sail is a wise investment once your old one becomes stretched, increasing heeling, weather helm and reducing performance.
It can be a bit tricky trying to spot exactly when your woven sails are no longer pulling their weight.
‘Generally a sail needs replacing once the sail has become baggy or misshapen as the performance will suffer and this means that the draught in the sail has moved aft making the sail much deeper and harder to trim,’ advises Chris Jeckells of the eponymous Norfolk sail loft.
‘A good way of checking the sail’s draught is to take a photo up the sail from the mast. Draw a straight line between the luff and the leech. If you do this each year you will be able to watch the draught move aft.
Also, if you need a lot of helm to go in a straight line, this is a good indication that your sails are baggy. Ultraviolet damage is another sign to look for as the cloth breaks down and becomes weak and will cause the sail to rip.’
Laminates will sometimes fail a lot more dramatically, but the usual warning sign to look out for is parts of the laminate wearing through in the high-wear areas.
Once you see mildew inside the laminate, you know the structure has finally been compromised and it is just a matter of
time to get yourself a replacement.
Get to know your local sailmaker for all your sail care needs
Skilled sailmakers are always happy to offer advice and help.
If you’re getting new sails made it’s completely reasonable to ask your sailmaker for some of the excess cloth.
Even if you’re not, there’s no harm asking if they have any offcuts that would otherwise go into the bin but be suitable for sail repairs.
It’s a good idea to get to know your local sailmaker: look after them and they’ll look after you. They may also stock sail repair kits and other items suitable for all your sail care needs.
Buying secondhand sails

When making repairs a palm will stop the needle slipping and stabbing you. Photo: Alamy.
If you’re buying a second-hand boat, take the sails to your local sailmaker and ask for their opinion.
Sailmakers are helpful and honest; they want you to come back and use their services (such as laundering, stitching, maintaining batten pockets, etc) year after year. No sailmaker is in it for the quick buck.
Essential sail care tool kit
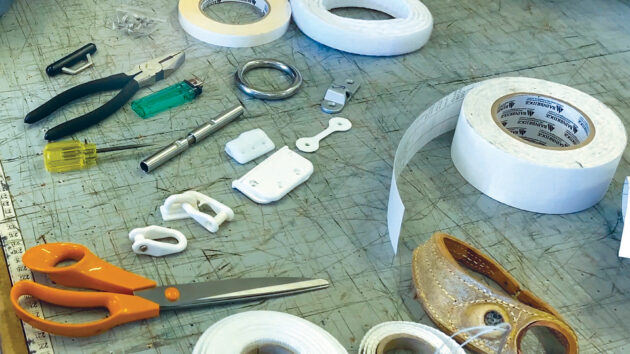
- PSA sticky back fabric
- Adhesive fabric discs
- Sailmaker’s palm
- Scissors (cloth shears and splicer’s scissors for cutting Dyneema)
- Wax hand-sewing thread and needles
- Webbing reels in widths of 12mm and 25mm
- Leech line cleats
- Spare sail slides and shackles
- Fid and bradawl – hammer through the sail to make holes for any heavy stitching
- A good pair of pliers to help pull the needle through
- Cigarette lighter for sealing threads
- Double-sided sticky tape to hold pieces in place rather than pinning
- Batten pocket ends
- M4 stainless nuts and bolts for sail fittings
- Vertical battens for furling sails, and batten joining kits
- Velcro webbing
- Dyneema line for lashings
From our readers: Neil Smith shares his Mid-Atlantic sail disaster

Neil and family had their damaged laminate headsail replaced with a more suitable Dacron alternative. Photo: Neil Smith.
‘Our sails came with Blue Pearl, the Moody 54 we bought for our Atlantic crossing.
We had them checked over in Santander and they were deemed OK for an ocean passage. We set off from Spain for the start of the ARC+ rally thinking we had good sails.
However, the headsail started to delaminate. It was made of two layers with a carbon-fibre mesh in between, and the glue appeared to be perishing. There were large tears coming up between the seams and we had to drop the sail and hand-stitch it twice while going along.
The first I knew of it was when I glanced up and realised the sail looked transparent – I could see the stars through it! I got my torch and shone it through the middle and saw a 2m split.
When stitching it, it was difficult to match the parts together – the net, mesh and two outer layers. After two days we realised it wasn’t going to be any good, so we stopped in Madeira and rang Rolly Tasker Sails.
He came to the boat to measure up, and the sails were made in five weeks, and delivered 10 days later. We also ordered a new mainsail, as our original was made from the same material, and we feared it might go the same way.
The new sails are 11oz Dacron, and they seem to be fairly good quality for a good price. For the yankee, I got costs ranging from £5,000 up to around £20,000 for high-tech laminate sails that would only last five years.
You can buy five plain Dacron sails for that much, and a baggy sail will still work, if not quite as efficiently.’
Enjoyed reading this article about sail care?

A subscription to Yachting Monthly magazine costs around 40% less than the cover price, so you can save money compared to buying single issues.
Print and digital editions are available through Magazines Direct – where you can also find the latest deals.
YM is packed with information to help you get the most from your time on the water.
-
-
- Take your seamanship to the next level with tips, advice and skills from our experts
- Impartial in-depth reviews of the latest yachts and equipment
- Cruising guides to help you reach those dream destinations
-
Follow us on Facebook, Twitter and Instagram.
Note: We may earn a commission when you buy through links on our site, at no extra cost to you. This doesn’t affect our editorial independence.