


YM expert Rachael Sprot steps aboard to help. This month she explains how to gain confidence with the spinnaker handling and usage
‘I have a confession to make,’ said my friend and fellow sailing instructor, Liz Le Mare, ‘I need spinnaker handling training.’
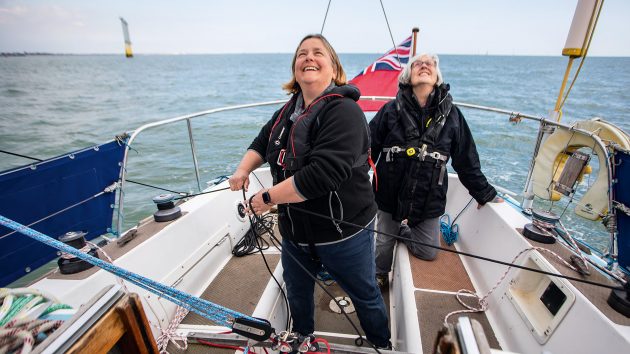
I was confused, since she’s often racing around the Solent as a regatta skipper. ‘The first mate does the foredeck for me,’ she explained, ‘I’m always at the back of the boat.’ It sounded to me like a bad case of backstay hugging – which afflicts all instructors – and that she needed to show the forestay some love. I agreed to an afternoon of training on her family boat, a Westerly Konsort, Bifröst. Her mother, Juliet, and husband, Richard, volunteered to crew.
Liz is not alone: spinnaker handling makes many seasoned sailors quake in their seaboots. The big, bright dragon in the sky appears to be governed by a different set of rules from white sails. Downwind sailing is under-taught in most sailing courses and spinnakers don’t feature on the RYA Yachtmaster syllabus. On many boats it’s a sail which lies dormant below the vee-berth.
If the spinnaker’s hibernation is interrupted, it’s usually under the skipper’s duress during a one-off event like the Round the Island Race. Unsurprisingly, the poor thing comes out in a bad mood, snorting fire and fury.
Despite the huge advances in gennakers and code sails, a symmetric spinnaker remains one of the best ways to sail downwind. Without one, or the skills to use it, you’ll find yourself resorting to the engine.
Rather than thinking of them as a party piece for special occasions, they should be part of our everyday wardrobe.

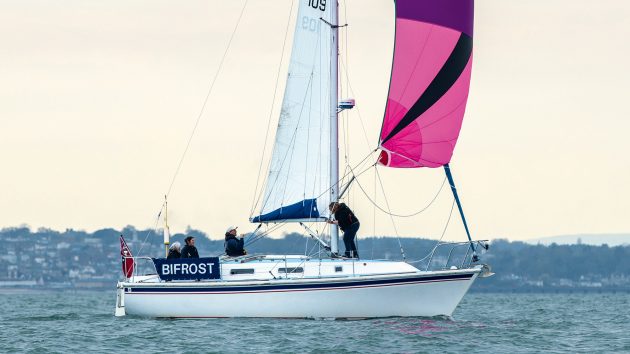
Conventional kites aren’t hard to fly in the right conditions once you’ve got it straight in your head. Downwind cruising can be faster and save you from motor sailing with a kite. Photo: Richard Langdon
Choosing you spinnaker
In a perfect world every cruising boat would have an all-purpose spinnaker to cover a broad range of wind angles. A medium-weight cloth is ideal for this. Lightweight cloth won’t cope so well with helming infractions and heavyweight cloth won’t fly in light airs.
In the real world, a brand-new spinnaker tends to be low on the priority list. Sailmakers will disagree indignantly, but unlike white sails, a spinnaker doesn’t need to be a perfect fit. A second-hand sail from a similar boat will often work well enough for occasional use. Liz and Richard were lent a spinnaker designed for a Hunter 32.
Made 25 years ago by the cadets at Castle Cove Sailing Club in Weymouth it had been a project to mark the 50th anniversary of the club but hadn’t seen much action since. It was a little on the small side for Bifröst, which suited us well.

The spinnaker jaws should open upwards. Photo: Richard Langdon
Spinnaker handling kit needed
Once you’ve acquired a spinnaker you need to be able to rig it. You’ll need a pole, halyard, sheets and guys. The pole needs an uphaul and a downhaul. Each line also needs the corresponding hardware such as snap shackles and blocks.
A few weeks beforehand Liz rummaged through the lockers and found most of what she needed. We both agreed that spending a fortune on new kit was unnecessary but some items were essential – blocks for the guys and sheets were missing.
She opted for low-friction rings attached to spliced loops instead. They’re much cheaper than blocks, and although they put slightly more resistance in the circuit, unless you’re racing you’re unlikely to notice the difference. Once you’ve acquired a sail you need to be able to rig it. You’ll need a pole, halyard, sheets and guys.
The pole needs an uphaul and a downhaul. Each line also needs the corresponding hardware such as snap shackles and blocks.
Spinnaker pole
Most poles on yachts under 40ft have a jaw at each end so that the pole can be used either way round. The opening jaws on the end of the pole are often referred to as the ‘beak’, and lines running the length of the pole make it easy to open either end. The pole should always be rigged with the jaws facing upwards.
Bifröst’s mast had a simple ring on the mast for attaching the pole to. Bigger boats will have a track so that the height can be adjusted. Bifröst’s pole had wire strops from which the pole was suspended.

A halyard block at the masthead needs to swivel. Photo: Richard Langdon
Spinnaker halyard
This needs to run through a swivel block to provide articulation. On a masthead rig such as Bifröst’s, this runs to the mast crane to project the head of the sail clear of the forestay.
Uphaul
The uphaul is a short line which supports the weight of the pole. Like the topping lift, there should not be much weight on this once the spinnaker is flying, as the sail will provide most of the lifting force.
Downhaul
The downhaul braces the pole into position against the guy and the uphaul. If using wire strops on the pole then the downhaul needs to run from a block on the foredeck. Bifröst had a fitting for a block just forward of the mast and a 2:1 purchase system. If you’re using the end fittings on the pole, rather than strops, you’ll need a block further forward. On some boats feeding the downhaul through the bow fairlead gives a clear line.

Sheets should be plenty long enough so you can give a big ease if needed. Photo: Richard Langdon
Spinnaker sheets
Spinnaker sheets run outside everything to a block on the quarter. They need to be long. In the case of a broach you need to be able to let out several metres to depower the sail.
Spinnaker guy
The guy is the line which connects the spinnaker to the pole. It runs through the ‘beak’ of the pole before attaching to the sail. The pole needs bracing from the beam of the boat, so the guy normally runs through a block at midships. It takes large loads so don’t skimp on the weight of the line.
Two sheets and two guys
On all but small boats, if you want to be able to gybe you’ll need two sheets and two guys, connected together as a pair. One will be working and the other lazy. Many cruising sailors snuff their spinnakers for gybing, giving the opportunity to re-rig the lines.

Lead the spinnaker sheets outside everything. Photo: Richard Langdon
Rigging the spinnaker
Spinnaker rigging is one of those tasks which can take five minutes, or 50.
The sheets, guys and downhaul can be pre-rigged alongside and coiled on the guardwires until needed. Only once you’re approaching the hoist position and settled on the correct gybe can you rig the pole though.
Liz and Richard had already rigged the pole while alongside to check the lead of the lines and then stowed it again. This was a useful familiarisation and saved time on the water. As we approached the hoist location it was time for Liz to leave her natural environment and head to the foredeck. With minimal input from me she set up the pole for a port gybe, double-checking the lead of the lines as she went.
Article continues below…

How do you moor a yacht in a tricky windward slot?
Andy’s home berth is alongside a walkashore pontoon on a river. Outside is another pontoon not attached to the shore.…

Heavy weather sailing: Essential boathandling skills
Coastal sailors usually have the luxury of waiting out bad weather safely tucked up in harbour, but sail for long…
Step-by-step
- Rig the sheets and guys. Attach the downhaul before lifting the pole from its bracket. This acts as a security line to prevent the pole from slipping into the water.
- Connect the pole to the mast with jaws opening upwards – important for gybing. If the height is adjustable, set it to around shoulder height to begin with. Rest the forward end of the pole on the bottom rail of the pulpit for security.
- Attach the uphaul. The jib sheet should rest on top of the pole and outside the uphaul, so that you could unfurl the jib if you wanted to, or you could hoist a hanked-on jib once the spinnaker is down. Position the spinnaker bag on the leeward side of the foredeck, close to the pulpit, and secure it to the guardwires.
- Put the guy through the beak of the pole and run the combined sheet and guy around the forestay, clipping it onto the nearest clew in the bag.
- Attach the leeward sheet-guy combo to the other spinnaker clew. Don’t attach the halyard yet; that needs to be done just before the hoist. Double-check the lead of all the lines.

Sneak the guy to the pole, then hoist the sail in the lee of the headsail. Photo: Richard Langdon
Hoisting the spinnaker
Hoisting and dropping a spinnaker is the hard bit. Once the sail leaves the bag it needs to reach the top of the mast, fast. If it inflates halfway up it will become very difficult to hoist and may end up in the water, so it’s important that the sheet is left slack and that there’s no holding back on the sweating. A snuffer or ‘wooling’ keeps the sail contained until you’re ready.
The first stage of the hoist is ‘sneaking the guy’. This brings the windward clew of the spinnaker around the forestay to meet the pole. The sail can snag, so someone needs to help it round as the cockpit team take on the guy. Once the halyard is attached the sail is ‘live’ – hoist straight away.

Sheet the spinnaker snug to the pole and take up the slack on the lazy lines. Photo: Richard Langdon
Step-by-step
- Raise the pole to horizontal. Check that the lazy sheet is sitting just on top of the pole. Attach the halyard to leeward of the headsail. Bring the pole aft to about 45° from the bow.
- Brace the pole into position by tensioning the guy against the downhaul. Sweat the halyard as fast as possible and shout ‘made’ once it’s at the masthead.
- Once the halyard is fully hoisted, sheet in and watch it fill. Furl away the headsail. Trim and tidy up.

Sheet out until the windward shoulder curls then sheet back just enough to make it set. Photo: Richard Langdon
Trimming a spinnaker
Spinnaker trim is far less complicated than it seems. The trimmer on a race boat worships the spinnaker, gazing at their god in the sky and constantly working the sheet. On a cruising boat in stable conditions we can take a more relaxed approach while still knowing who’s boss.
Broadly speaking we trim the spinnaker using two things: the pole position and the sheet. The pole is much like the boom: it needs to be closer to the centreline for tighter reaching and brought aft for deeper angles. The sheet is no different from other sheets – if in doubt, ease it out. There are two cues to watch for: the shoulder curling; and the body of the sail collapsing.
Shoulder curling
Treat this like the tell-tales on the luff of your jib – a little bit of a curl, six inches or so, is the slight lift on the inner tell-tale.
It says that you’re on the windward limit of your sail setting. If the shoulder starts to curl more and begins to invert, you’re too close to the wind. In the first instance sheet in and bear away. If it continues to invert, ease the pole forwards for tighter reaching angles and sheet in.

If the spinnaker collapses behind the main, bring the pole aft. Photo: Richard Langdon
Collapse
If the whole sail collapses then it’s not receiving enough airflow. It’s most likely blanketed by the mainsail and could wrap itself in the rigging. Hardening up and sheeting in should be your first reaction.
Once you’ve recovered you can experiment with bringing the pole aft and easing the sheet out to help the sail find clean air.
Pole height
Pole height is determined by the height of the free-flying clew – we want to keep them symmetrical. This setting will tend to be lower when reaching, and higher when running.
Adjust with the uphaul and downhaul, and if you can adjust the inboard end, the pole should remain as close as possible to horizontal to the deck.
Helming under spinnaker
Despite protesting that she’d never flown a spinnaker, Juliette helmed all afternoon and proved to be a natural. The same sense of feel that informs upwind helming is valuable downwind too. As the boat starts heeling and powering up, it’s a sign to bear away. When the boat feels slow and upright, you’re probably too deep. A good tip is to steer beneath the spinnaker. If the spinnaker starts pulling you off to leeward, follow it downwind – you’re probably reaching too high. If it’s rolling to windward, you’re probably a bit low.

Centralise the boom and ease out on the guy. Photo: Richard Langdon
Gybing under spinnaker
Gybing a spinnaker can be fraught because, unless you have two poles, there’s a period when the sail flies purely on the two sheets. At this point the spinnaker is much less stable, so sensitive helming is required, and a course deep downwind. It’s not for the faint hearted or short of hands, but Bifröst was lacking in neither so we decided to try it.
There are two methods of gybing the pole: dipping it, where the inboard end of the pole remains attached to the mast while the other drops onto the foredeck; or, if a babystay or inner forestay is fitted as it is on Bifröst, end-for-ending it. During an end-for-end gybe the pole is detached from both the guy and the mast and floats across the foredeck, suspended from the uphaul via the two wire strops. There are a lot of ropes involved but Liz, Richard and Juliet were soon gybing confidently.

Adjust the sheet and guy to get the sail sheet on the new gybe. Photo: Richard Langdon
Step-by-step
- Bear away onto a run. Centralise the main so that it can’t crash gybe. Take up the tension on the lazy sheet. This should be sitting on top of the beak of the pole and not beneath it.
- Ease off the uphaul or downhaul a few inches to make it easier to handle the pole. Open the beak of the pole to release the working guy and fly the spinnaker on the two sheets.
- Take the inboard end of the pole off the mast. Grab a bight of the new guy (it will need lots of slack) and put it through the jaws of the pole. This will be the end which was previously attached to the mast. Push the pole outwards and attach the new inboard end to the mast.
- Turn the boat through the wind. Take up on the new guy. Ease the old sheet and trim the new one. Re-tension the downhaul and uphaul. Ease the main.

To drop, bring the lazy guy to the companionway and flake the halyard ready. Photo: Richard Langdon
Dropping the spinnaker
This is the moment with the greatest potential for problems. If the spinnaker re-inflates halfway down it may end up in the water, which will be hard to retrieve.
The person on the halyard controls the speed of the drop. They need to ease as swiftly as it can be gathered in.
Dropping behind the mainsail and gathering it into the companionway hatch is the standard technique and it worked well on Bifröst. This also gives the crew somewhere secure to stand. If the main is loose-footed you can pull the spinnaker through the ‘letterbox’ – that’s the slot above the boom, which helps to squeeze out the air.
Unfurling the headsail first helps depower the spinnaker in windy conditions. On a benign day, such as we had on the Solent, maintaining a steady downwind course will keep it well-blanketed behind the main.

Work along the foot, the sail will be shadowed by the main. Photo: Richard Langdon
Step-by-step
- Flake out the halyard so that it’s
ready to run. Bear away onto a deep broad reach. - Ease the guy forward and take in on the downhaul so that the foredeck crew can reach the tack to release it – it should fly off to leeward. Alternatively ease the guy and lazy sheet until the pole rests on the forestay, and then let them run.
- Use the lazy guy or the working
sheet to pull the sail into the companionway hatch. Ease the halyard down swiftly, but not so fast that the spinnaker ends up in the water. - Try to gather the sail along the foot first, and then into a sausage to reduce the risk of re-inflation.
Being able to handle a spinnaker well is good seamanship, and makes downwind passages a whole lot more enjoyable, and quicker. Photo: Richard Langdon
Conclusions
Liz has a strong sense of seamanship and a cautious approach to risk. She’s a natural instructor and puts people at ease by creating a safe environment but this means staying in the cockpit and keeping the overview. For her to venture forward, she needed experienced hands in the cockpit. Now that she’s done the foredeck work herself, she’s confident that she and Richard could fly the spinnaker double-handed.
Liz is not alone in struggling to find opportunities for her own learning. By default skippers have the most experience on board. Long-term investment in training your crew to helm and handle lines will pay off. However, sailing with experienced sailors allows you to push the edges of your skillset, rather than staying comfortably inside it. Pole drills alongside the berth and poling out the headsail make the transition to spinnaker work easier.
Most ‘white sail’ skills transfer naturally to downwind sails, especially helming. Get to know your spinnaker in benign conditions when you’re unlikely to have major problems. Spinnakers, like dragons, aren’t naturally aggressive, they’re just misunderstood.
Enjoyed reading this?
A subscription to Yachting Monthly magazine costs around 40% less than the cover price.
Print and digital editions are available through Magazines Direct – where you can also find the latest deals.
YM is packed with information to help you get the most from your time on the water.
-
-
- Take your seamanship to the next level with tips, advice and skills from our experts
- Impartial in-depth reviews of the latest yachts and equipment
- Cruising guides to help you reach those dream destinations
-
Follow us on Facebook, Twitter and Instagram.