


Do you know how to prevent problems with your yacht rigging and sails, and what to do when things go wrong? Bruce Jacobs looks at the six most common problems...

Yacht rigging is a dark art and no one will ever convince me otherwise. I have yet to meet two riggers who agree on anything – and there is no manual to read up on. It is a world of angles, tension, loads, corrosion, metal fatigue and, most of all, opinions.
Ask your surveyor, rigger and insurance company a question about a rig and you’ll see what I mean. It is perhaps no surprise therefore that the rig ends up being one of the most commonly overlooked areas on a yacht with regard to maintenance, even though it should be near the top.
With Rubicon 3 yachts sailing high up in the Arctic or far out on the oceans, rig condition is something we obsess about. For many sailors, however, the first time they really think about their rig issue will be when they are at sea and things start to go wrong.
Many years ago, I was delivering a 50ft Beneteau across the Tyrrhenian Sea from Corsica to Sicily. With only two of us on board, we were short-handed
but expecting no more than a Force 6.
As is not uncommon in this area in early autumn, a mini weather system came through and things quickly got difficult. As we tried to reduce sail, the roller furler jammed. A nasty situation was made worse as the autopilot was overwhelmed by the now 40-knot winds and big sea state.
Devise an emergency plan
The decision was made to drop the sail, so we fully unfurled it (quite something in these winds) and began to lower the halyard. It jammed halfway down. Unable now to get it up or down, or furl it away, we were left with a full genoa, halfway up the forestay and completely out of control, doing its best to shake the rig to destruction.
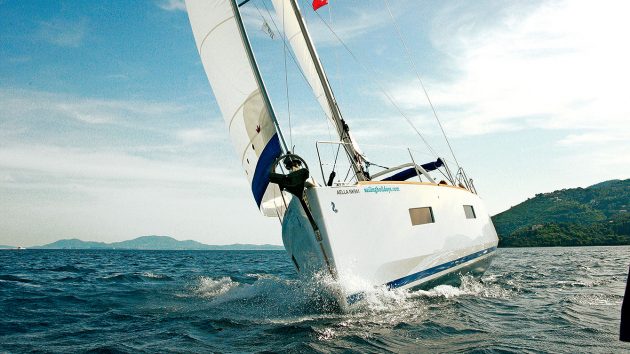
Furling sails make life easy, but a jam can be serious
It was now a severe gale, with lightning visibly striking the water and hail lashing the deck. A 50-knot-plus gust proved to be our saving grace. Its force was enough to free the jammed swivel and the sail came crashing down onto the foredeck and was quickly bundled down the hatch.
A later inspection in Sicily showed that two rivets had come loose in the foil causing all the problems. It was a lesson well learnt about the need for proper maintenance.
It is worth considering what could go wrong with your sails and rig and how you would cope if it does. This article covers six of the most common issues you may face and how to prevent them happening.
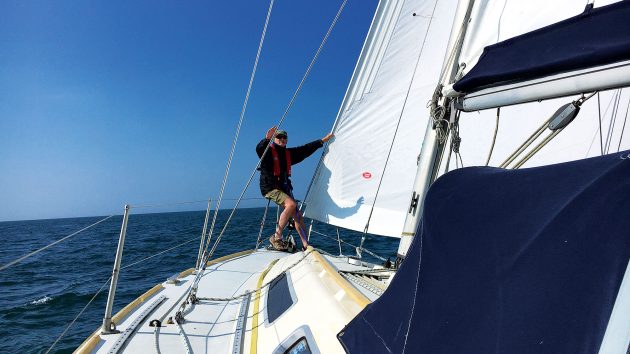
A word of caution. Even in light winds, sails, ropes and wire rigging can cause serious injury. Be extremely careful and get professional assistance wherever possible.
Roller Furler Problems
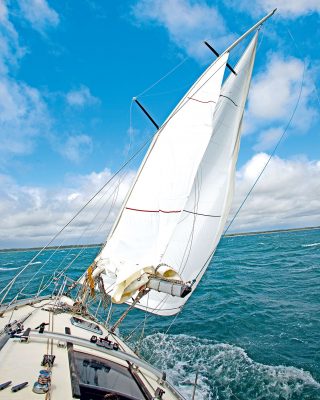
The development of the roller reefing furler was undoubtedly one of the biggest aids to cruising. At a stroke it removed the need to head out onto the foredeck in strong winds and haul-down sails, lash them to the deck, hank on a new sail and hoist it up. Instead we can now control the headsail area from the comfort and safety of our cockpit.
Remember, however, that the typical genoa for a 40ft boat will be over 40m2 (430sq ft) of sail. You can be sailing along in a fresh breeze and suddenly have all that sail open up.
Roller furlers can also jam fully open, fully closed or somewhere in between. In any of these situations, you could have a serious situation on your hands.
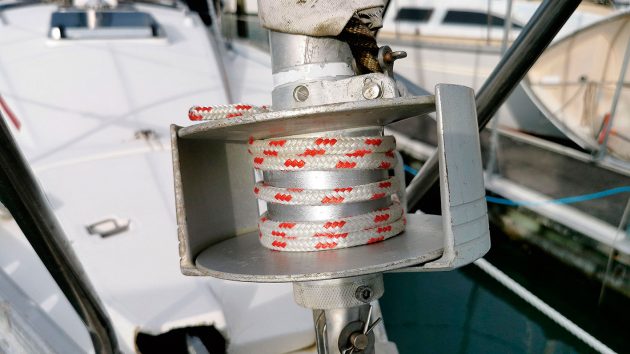
There should still be some turns on the drum when furled, but too many could cause a jam
Sail jammed closed
Likely more of a frustration than a serious issue. Check to see the furling line is not jammed in the furling unit. If the rope is too thick or too much is left on the drum, it’s possible for a jam to occur. Ideally, look to have three turns left on the drum when fully stored.
If the line is not jammed, you likely have other issues such as seized swivel drum unit bearings or a halyard wrap. You will need to wait for the wind to drop, remove the sheets, manually unwind the sail, drop it and find the cause of the issue.
Sail jammed open
A dangerous situation and one you need to rectify quickly. Have a quick check with the binoculars that it is not a halyard wrap. If it’s not, the most likely scenario is that the sail opened too fast, or with not enough sheet tension, and the furling line is now jammed in the drum.
If it is safe to do so, open the drum and manually unwind the line, before re winding it. If this doesn’t help, you likely have a problem with the bearings in the swivel or drum.
Bring the sail under control, unattach it from the furler drum and lower it. Then inspect and repair it, but only if it is safe to do so.
Halyard wrap
If the halyard wraps around the forestay when furling, try opening up the sail again, depower it and let it luff a little to shake things loose. Then try refurling. If the wrap isn’t too bad, this can free it. You may need to do this multiple times to get the sail fully furled.
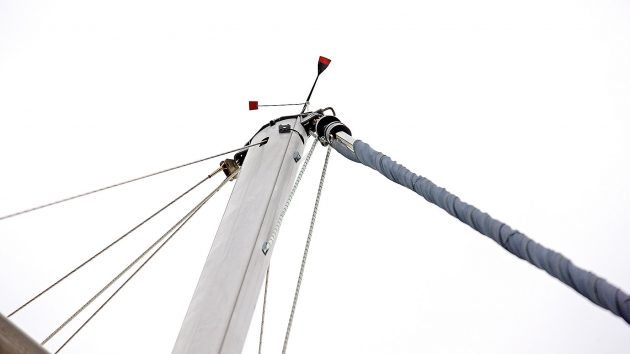
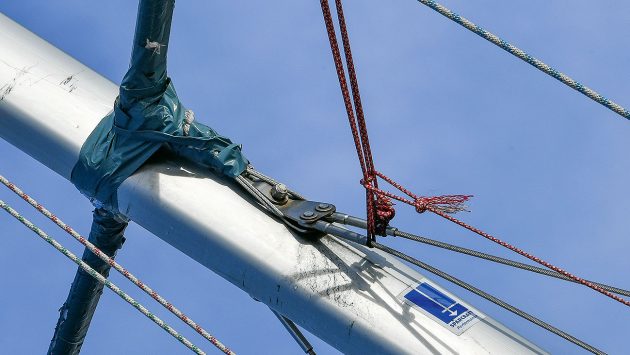
The halyard and foil should not be parallel at the masthead
If this doesn’t work, your only choice is to unfurl the sail fully, unattach the tack from the furling drum and lower the sail, pulling it out of the foil as you do
so. You’ll need to try and work out why the wrap is happening (usually it’s because of an issue with the length of halyard or its lead angle to the swivel).
Sail jammed half open
This is probably your worst case scenario, as now you can neither furl the sail nor open it and drop it. Probably your only option, and you really need to be careful that the wind is not too strong, is to remove the sheets and try to pass the sail around the forestay and gradually get it under control, lashing it with sail ties or rope where possible.
If this is impossible and you’re in trouble, you may ultimately have to cut the sail off, in itself a hazardous operation.
Never force a roller furler
When a sail won’t open or close it can be hugely tempting to put the line on the winch and try and force it open. This is a recipe for disaster. If the swivel is jammed, the furling line has riding turns or the bearings are gone, putting more force on the system will likely increase your problems. Wherever you can, try to solve the issue, not force it.
Keep an eye on the furling drum, and on the masthead swivel to avoid halyard wraps or other problems. Avoid using the winch to furl the sail away
In-mast mainsail furling issues
To prevent your mainsail jamming, it’s important to understand that it works in a similar way to your genoa furler. The luff of the sail slides into an aluminium foil which then rolls the sail away, usually in an anti- clockwise direction.
The big issue is that all the sail has to fit into the mast, and unless you furl it away carefully, it will jam. Try to furl on starboard tack, to reduce friction where the sail enters the mast.
Ease the mainsheet and outhaul a little. Too much outhaul and you can bend the furler. Too little and the foot will be too loose and jam. This will also happen more as your sail ages and gets baggy, hence why mast furled sails need to be replaced more often.
Even if you do get the sail furled away, if it went in too loose, you can find it hard to get back out. You need a nice tight wrap.
If you’re still jamming, make sure your boom height is keeping the luff straight and check your halyard tension as vertical creases can cause problems. You want to have just lost your horizontal creases.
If you have adjusted your backstay tension, you may find your furling mechanism is jamming inside the mast.
Maintenance Tips
With roller furlers, it really is the case that prevention is better than cure. Follow this guide and hopefully you won’t have to worry about the issues described.
You or your rigger should be conducting an annual full mast-up rig inspection. As part of this, if you haven’t dropped your sail recently and inspected the swivel, drum, foil, sail and halyard, you really should do so before you sail again.
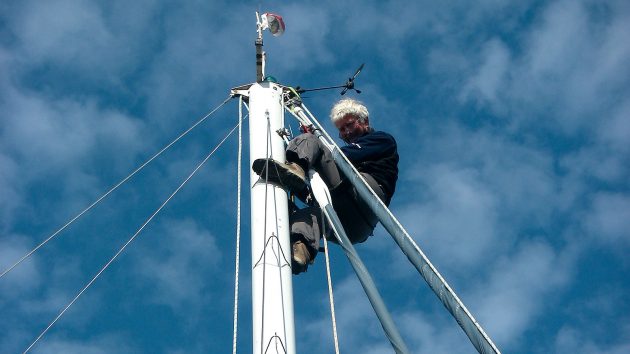
A mast-up rig inspection should be done every year
To prevent halyard wraps, with the sail hoisted, make sure the remaining halyard is not too long. Ideally its lead to the swivel should also not be vertical, but at around 10-15°. A loose forestay can also cause wraps, so check tension.
Make sure the furling line heads into the drum at 90° to prevent riding turns. Wash the furling drum with lots of fresh water to stop salt and dirt deposits building up inside. Open the drum and make sure you can see where and how the furling line attaches in case you ever need to replace it in a crisis. Make sure the line has no chafe.
With the sail lowered, turn the swivel and furling unit. They should turn easily, without any bumps or jams. If not, the bearings may well be worn and you should have the unit repaired.
Still with the sail lowered and using binoculars, or heading up on a bosun’s chair, inspect the joins on the foil. Screws and rivets can begin to push out and jam the unit should you try to lower it next time (which may be an emergency).
Broken or lost halyard
A halyard breaking or coming loose whilst under sail is not a pleasant experience and can be dangerous. It really should not happen, and if it does there has been a fault somewhere. Either the halyard was not strong enough for the job, it has chafed through or the shackle has failed or was not closed properly.
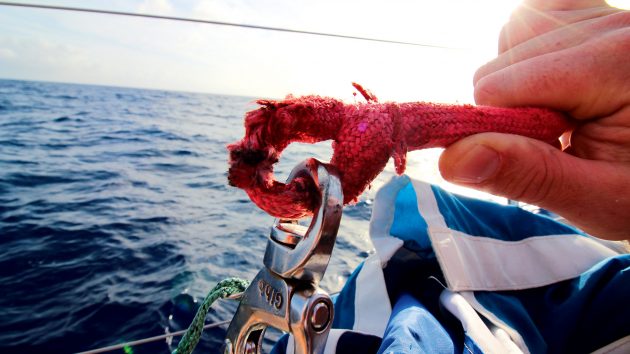
If this spinnaker halyard had chafed through, it could have resulted in the loss of the sail as well as the halyard
Either way, once it has detached from the sail you are left with a nasty situation and you need to try and stop it getting worse. A word of caution. The mainsail is what holds the boom up under sail, so if the main halyard comes loose you have a potentially dangerous situation.
This is why you must always leave the topping lift loosely attached or have a boom strut that can support its weight. It is a key safety device and will stop the boom dropping down onto someone in the cockpit.
As always in a crisis, the first thing to do is stop and take a minute to collect your thoughts. Get the boat hove to as best you can to reduce the motion and minimise speed. If at all possible, you want to stop the halyard disappearing down the mast, so be gentle and don’t haul on any ropes.
Although there are various suggestions and gadgets you will be told about, in most cases the next step is a journey to the top of the mast and this is best done alongside in calm conditions. Not only will it be safer for you, but the halyards will be hanging vertically down rather than flying out to
the leeward side.
If the rope has not gone down into the mast, your best bet is to grab hold of it and as you are lowered down, bring the rope with you. If it is still long enough, you can remake your halyard. If it is now too short, you can reeve a new halyard to the end of it and keep pulling through until you are fixed.
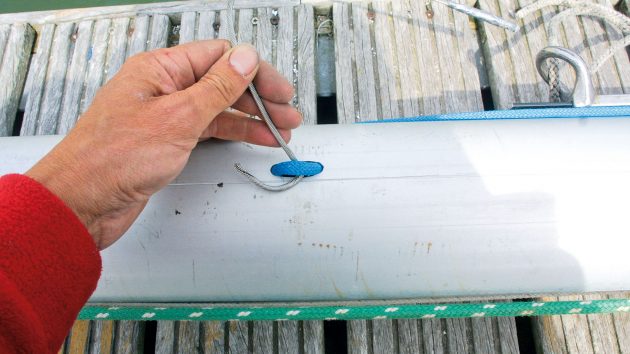
Fish out the new halyard with a bent piece of mousing wire
If you are unfortunate enough for the halyard to have disappeared down the mast, life is trickier. First, pull all the other halyards tight, so that they do not get in the way. Next get some thin messenger and firmly attached a weight to the end of it. Some bike chain or a row of bolt nuts can be really good for this.
Leaded rope is also an excellent choice (it’s worth having some on board just for this) and is less likely to get caught up in the internal spreader bar or cross bolts.
Lower your weighted messenger line down from the top of the mast until it is just past the exit gate for the halyard. The weight generally makes enough noise against the mast to hear where it’s currently at.
If you’re using a bike chain, a magnet on a stick can pull it out of the gate. Whether using chain or a leaded rope, it’s also worth having some welding rod or mousing wire shaped into a hook, as this will also grab the line.
Now pull the messenger line out of the gate and down to deck level. Now attach a new halyard to the messenger line and pull it through.
Broken Rigging
Your mast and rigging should be unstepped and have a full ground level inspection every four to five years, looking for corrosion, metal fatigue, damaged fittings, seized parts and more.
Thereafter, every sailor should be carrying out a general check on all their rigging prior to leaving the dock. Standing rigging has a maximum life of 10 years or 40,000 miles, whichever comes first, so you should make sure you know where yours is in its life cycle.
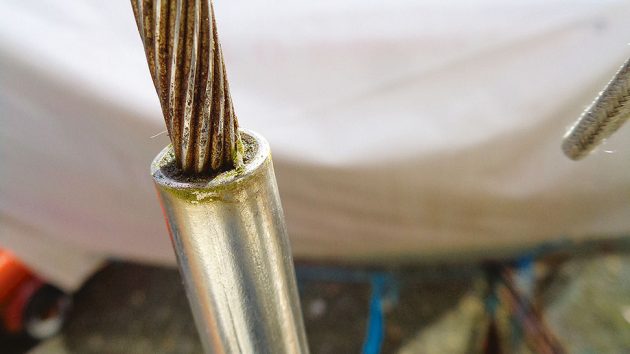
Wire rigging has the advantage that should a strand break you can see it and know that immediate action needs to be taken. Rod rigging however, unless serviced on a regular basis, may fail without warning.
In the Golden Globe Race, Jean-Luc van den Heede’s lower shroud bolt pulled down through the mast wall
Rigging tends to suffer from fatigue due to lack of articulation when the rigging goes slack on the leeward side. If it’s going to break, it is almost certainly going to happen between the swage or mechanical terminal fittings and wire and it will likely be shortly after the previously slack leeward side is brought back under load after a tack or gybe.
However much you care for your rig, it’s possible that failures can still occur. Should a failure occur, you have to act fast. The golden rule is to get the load onto the opposite rigging as fast as possible.
So if your port shroud breaks, get onto starboard tack. If your forestay breaks, head down wind. Immediately use every spare halyard you have, attaching them to strong points near where the rigging was attached and crank them in hard. They will give your mast some added support.
Also, slow your boat right down, reef your mainsail to bring the centre of effort as low as possible and do everything you can to reduce the loads on the rig.
If you spot a wire strand fail while at sea, tack immediately to take the load off that side
It’s often best not to take your mainsail all the way down as it acts as a damper to reduce rolling. If a shroud goes, you will have to see if there is a way to jury rig it to the deck and then tension it to support the mast – but this really depends on what has broken and what you have left to work with.
A really useful back-up to consider is extended mechanical compression terminals, such as Sta-lock. It will mean using a hacksaw to cut off the end of the rigging wire, but they are then relatively easy to fit and will give you a good chance of getting underway again.
Dismasting
When it all goes wrong, it generally happens quickly and dramatically. Whatever the cause, when a mast decides it’s coming down, there is no stopping it.
A real-life dismasting can be a strangely slow-motion affair. Note the port cap shroud fails first, letting the top of the mast fall off to leeward
I have only had the misfortune to be dismasted once, and it was a curiously slow-motion affair, watching the aluminium spar bend and come down onto the deck.
It is obviously a dangerous time and keeping the crew safe is paramount. You will be in shock and as always, your first step has to be to pause, control your emotions and make a quick plan.
There will likely be loose standing and running rigging, and this can be swinging wildly. Put on some heavy-duty gloves (from your flare box, perhaps) and try to grab these and get them under control. Use sail ties or whatever you have to hand. You have to reduce the risk of injury to crew as quickly as you can.
If any spars are in the water, they can quickly act like a battering ram and cause you real problems. You have to do whatever you can to prevent damage to your hull. Try using fenders, bunk mattresses or whatever else you can find. Don’t be too quick to cut it away. You may need to try and make a jury rig and this spar might be your best bet If you can get it safely back on board.
But make no mistake, recovering a spar from the water will likely be very difficult and in tough conditions, almost impossible. What you must not do is end up with a casualty overboard or a crew member injured on deck.
If you can recover it, get it lashed down until you can make a plan. If you have to cut it away if you can’t retrieve it, cut it loose and protect the hull yourselves.
A good fine-toothed hacksaw is very often the best bet, making sure it has a strong metal not plastic frame and that you have a good few spare blades. Although very expensive, a set of hydraulic bolt croppers is also a near fail-safe option.
Enjoyed reading this?

A subscription to Yachting Monthly magazine costs around 40% less than the cover price.
Print and digital editions are available through Magazines Direct – where you can also find the latest deals.
YM is packed with information to help you get the most from your time on the water.
-
-
- Take your seamanship to the next level with tips, advice and skills from our experts
- Impartial in-depth reviews of the latest yachts and equipment
- Cruising guides to help you reach those dream destinations
-
Follow us on Facebook, Twitter and Instagram.