


We all have a pre-season boat checklist, but are your instruments lying to you? Our expert, Justin Morton, gives this guide to ensuring your electronics are accurate
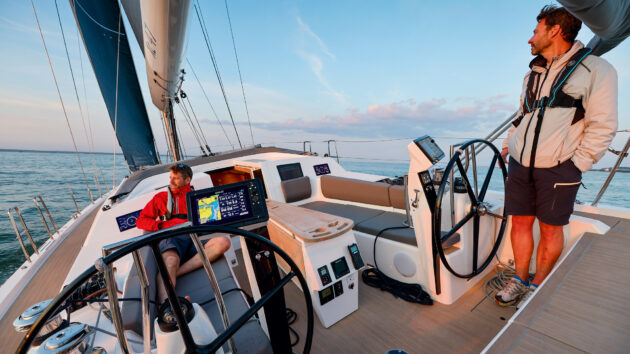
We are all familiar with the list of things we need to do to get our boats ready for the coming season, but one area often overlooked is our electronics. At a time when we are so used to relying on what our instruments and plotter tells us, it would be good to know that what they are displaying is accurate.
How to check and set things up varies by manufacturer and age of device, but what we need to check will likely be the same for all of us. What follows is a guide that is as far as possible true whatever brand of electronics you have, and looks at updating software, updating charts, checking and calibrating sensors, setting up your displays, calibrating your autopilot and giving your batteries a health check.
Update your software
It’s worth making sure you’re using the latest software because manufacturers continually develop their in-service products and you may be missing out on new and improved features. They also support and provide software updates long after a unit has been superseded, so it’s worth checking. There are three ways to update your system: direct internet link, companion app for mobile devices, and memory card file transfer.
Your Multi Function Display (MFD) connecting to the internet to download updates is the most straightforward way to do it. Both Navico’s (B&G, Simrad, Lowrance) and Raymarine’s newer MFDs will connect to your phone and can do this.
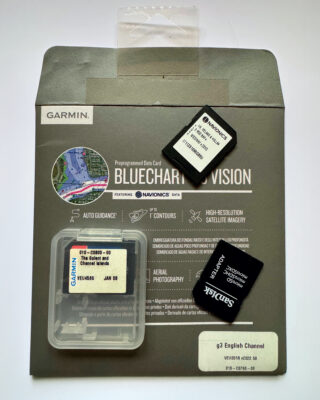
Charts may come preinstalled on chart cards, such as this Garmin BlueChart 3D Vision and other cards
Garmin use ActiveCaptain, their companion app, which links through WiFi to your MFD to manage the updates. Garmin’s (and Navico’s) companion apps learn your system configuration and then act as digital briefcases, downloading and transferring updates when they connect. Garmin also provides the Garmin Express app for your computer, which mirrors much of the functionality of ActiveCaptain but also manages any other Garmin products you may have.
To update by computer, all manufacturers provide direct file download, which you copy to an SD or MicroSD Card and then insert into your plotter. Garmin release a single software update file with everything on it. Raymarine and Navico provide updates by device for download to a computer.
To manually find out if there is an update available, searching directly online for software updates by the make and model of the device works well. All of the manufacturers have good support sections, and updates and manuals are easy to find.
If your plotter isn’t listed, check the discontinued section. Go for the latest (highest numbered) software version; your software version should be listed under ‘System Information’. Even for really old systems, it’s still worth checking because updates are released to make newer sensors compatible and keep old ones working properly. Update pages will also give details of what extra functionality or fixes are included. Once you have your latest software, don’t forget to download the latest manual(s) that go with it.
Your chartplotter will download the updates first (or read the memory card).
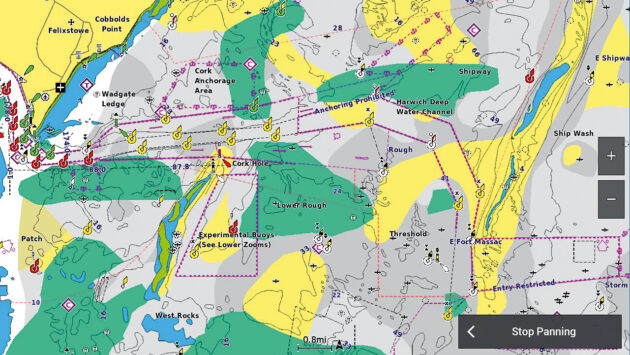
Electronic charts provide far more information and detail than traditional cartography
It will then ask you if you want to install the new software. You should note that there will be warnings displayed regarding updating the system’s software and backing up your data. You are replacing the software that makes the unit work, so if the new software doesn’t load into a device properly, it may not come back to life.
Make sure you follow the instructions to the letter and can guarantee you can give it the time to complete the process it needs (which could take an hour).
Newer systems’ software is designed differently so failed updates will likely just frustrate you rather than break anything.
If a device fails to update, just try it again.
Update your Charts
We would all prefer to be using the most up-to-date chart information, and if you have a chart with a subscription, the easiest and cheapest way by far is to just keep your subscription going. However, it is worth checking the enhanced offerings, because ‘charts’ can include so much more than just traditional chart information. If you haven’t updated your charts for a while (or ever), understanding what to buy and what you get for your money can seem a little opaque.
Buying a chart on a physical memory card is straight forward and you can buy them from your plotter brand website or anywhere that sells electronics. Practically all plotters read charts from a card. New charts will vary in price from around £150-£400 depending on the size of the area and whether you choose either standard or enhanced versions.
Relief shading, 3D view and aerial/satellite photos are enhanced offerings (called ‘premium’ by some manufacturers but ‘premium’ means something different for others). Your chart card becomes copy-protected by linking to your plotter or account when you start using it.
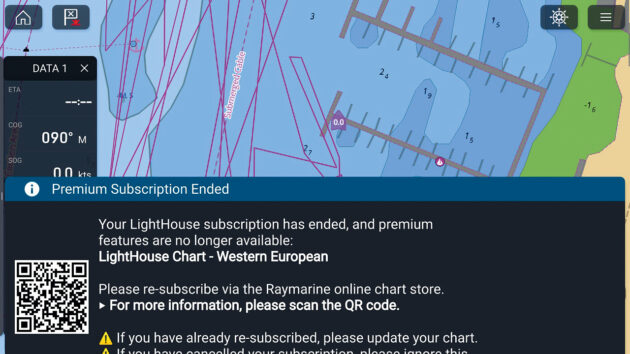
Screenshot of Raymarine Axiom2 Pro showing chart subscription has ended
This effectively ‘locks’ it to you and your device, but there is some latitude to change devices and re-download – how often varies by manufacturer. Included in the price will be a subscription, usually for 12 months, which is both an entitlement to receive subsequent ‘updates’, but in some cases, continued access to ‘premium’ features like auto-routing, almanacs and cruising guides.
‘Updates’ refers to two different things. First it’s chart corrections, and Garmin-Navionics and Navionics (same data, for different devices) incorporate new data usually within 15-30 days of receipt; releasing daily updates. Raymarine update every few weeks, and C-Map, five times a year.
‘Updates’ also refers to new versions of the chart you already have, which you can buy for around half the cost of ‘new’. Garmin BlueChart (for older Garmin) updates annually (late Feb for 2026), and if the subsequent update is released within a year of purchase, you’ll get it free. Renewing your ‘subscription’ is the same as buying an update, again at half the cost of a new chart, which entitles you to keep receiving corrections, along with the ability to access any additional features that were bundled in.
Even if your subscription lapsed some time ago, it’s still worth checking if you are eligible for a half-price update.
To look for an update, first check what charts you have. The details will be on your chart card or chart/card information screen. Navionics and C-MAP are multi-platform providers who maintain and supply charts for lots of different (and legacy) systems, even though they’re owned by Garmin and Navico respectively.
Raymarine have their own Lighthouse Charts, although their plotters also work with several other chart manufacturers. Older Navico devices can use either Navionics and or C-Map, but the newest devices are C-Map only. Most Garmin devices can use Garmin BlueChart but newer ones can also use Garmin-Navionics (not Navionics), their latest cartography.
Navionics and C-Map users can configure and manage charts and updates directly through their respective chart manager apps via computer. Raymarine has a chart manager website for its Lighthouse Charts, which can also be managed through the Raymarine companion app.
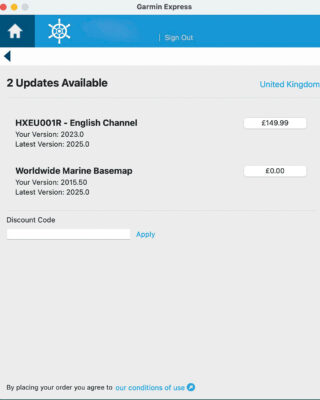
Garmin Active Captain showing new chart version (updates) are available to purchase
Garmin-Navionics and Garmin BlueCharts can be downloaded through Garmin Express, or managed in the ActiveCaptain. Navionics users also have the option of using the Garmin Boating App to manage charts in Raymarine MFDs, as long as they also have a Boating App subscription.
Newer Navico MFDs have a C-Map Chart Manager app built in to manage charts directly from the device; they can also be managed and configured through their companion apps.
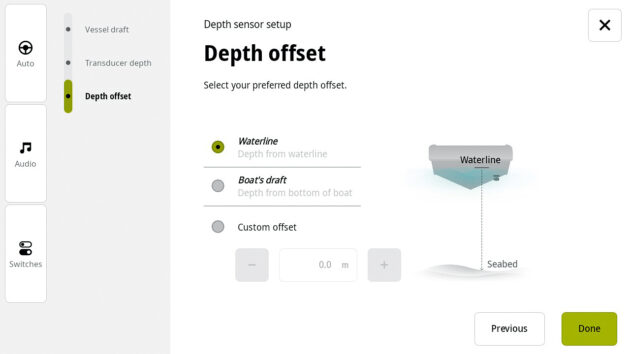
Choosing where you want to read your depth from on a B&G Zeus Depth calibration page
Check Your Sensors
Most boats’ instruments typically measure only five things: depth, distance travelled through the water, wind direction over the boat, its measured speed, and magnetic heading. Your instrument heads and chartplotter both display and use this raw data to calculate secondary information, and if you want to rely on it to make decisions, you need to know it’s accurate.
Depth
The depth reading from the sensor to the seabed can’t be adjusted but we do need to know where the measurement is being taken from. If your boat is out of the water, measure and record the distance from your waterline to the bottom of the keel and from the bottom of the keel to the sensor, which will allow you to work out the distance from the waterline to the sensor, which is otherwise a tricky measurement to make.
Record and input that information into the chartplotter or instrument display. Make sure the adjustment is only made once on your system, and check the reading is the same everywhere depth is displayed, in case the offset needs to be set on instruments and MFD separately.

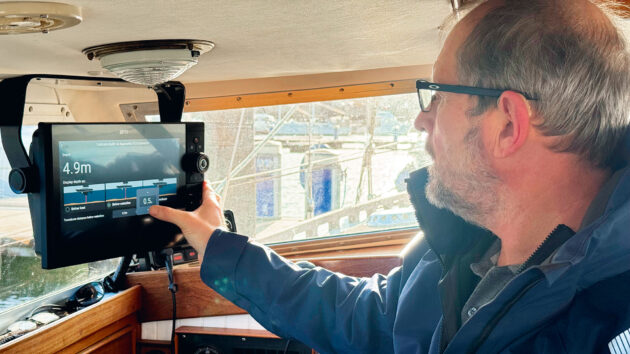
Measuring the water depth close to the depth sensor with a weighted line in order to check the reading is correct
If your boat is in the water, plumb the depth (on both sides and interpolate if necessary) then change the offset to match your measurement, either from the water line or from the keel (as long as you know your draught). Even if you have taken careful measurements ashore, it’s worth plumbing the depth once you’re back in the water to make sure you haven’t adjusted things the wrong way.
Paddle wheel log
We no longer pay quite so much attention to our distance travelled through the water but the information is still being used. Our instruments need it to calculate our true wind speed from the measured apparent wind,
and it’s also fundamental to compare our boat’s speed through the water to its speed over the ground (SOG).
Having also compared our heading against course over the ground, it can then calculate tidal set (direction) and drift (speed). This then allows tidal lay-lines to be calculated and displays real-time tide arrows so we can quickly see what the tide is actually doing to us.
Apply your offsets either from your measurements taken ashore or adjust the offset until the depth reading and the plumbed depth measurement match
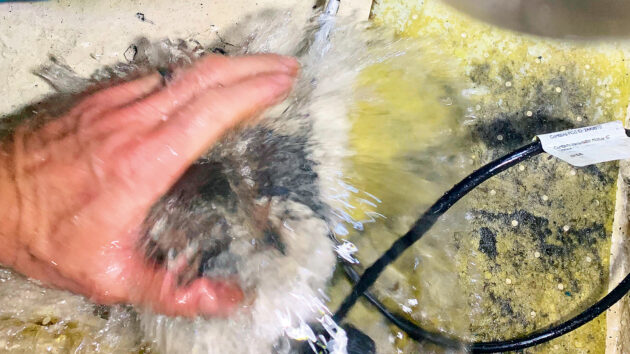
Clean it
First off, your log needs to be clean. If you haven’t removed your log when your boat is in the water before, make sure you are prepared and everything is close to hand. Don’t expect to get the log out and replaced with the blanking plug in one go. Pull it out and cover the hole with your hand. Then when you are ready, put the blanking plug in.
How much water comes into the boat will depend on the type of through hull fitting you have but it can be quite alarming, hence the two stage approach.
Next clean the log. The pin does come out so you can remove the wheel. Once it’s as clean as you can make it, check it’s not damaged or scored, and reassemble. The flat/smooth face points forward (as does the arrow on the top).
Blow over the wheel from a few inches away to make it spin. With the amount of puff you’d need to blow out a candle, it should spin and keep spinning for a few seconds. If it doesn’t, it’s either not clean enough or worn and needs replacement. New wheels are around £40 and come with new O-rings. Don’t overtighten the plastic collar when you put it back in.
Showing how much water comes into a boat with a non-self-closing depth speed transducer skin fitting
Calibrate it
Next you need to ensure it is calibrated. The simplest method compares your satellite derived SOG with the speed through the water (STW). Most brands give you this easy SOG comparison option but you will have to head out to open water to do it. More complex ‘wizards’ will want you to sail around in a square pattern or do timed runs over a set distance. The latest logs will calibrate for angle of heel and can be set up through their own Bluetooth-connected app.
When you are moored and water is passing under the hull, your log should indicate a speed. If it’s not, it needs a clean. As the season progresses the fouling on the hull around your (clean) log will also disrupt the flow, so it’s also worth calibrating mid-season. Of course, if you want to keep the log clean, it may be worth removing it and putting the blanking plug in its place any time the boat isn’t going to be sailed for more than a few days.
Wind Sensor
The anemometer is calibrated at the factory and will be more than accurate enough for our purposes. However, the cups can get damaged (easily replaced), and the bearings do wear out or corrode, which will slow it down. Check your cups/propeller aren’t damaged (use binoculars) and compare the speed of your anemometer to others on a light wind day. Compare others at a similar height because both direction and speed could be different.
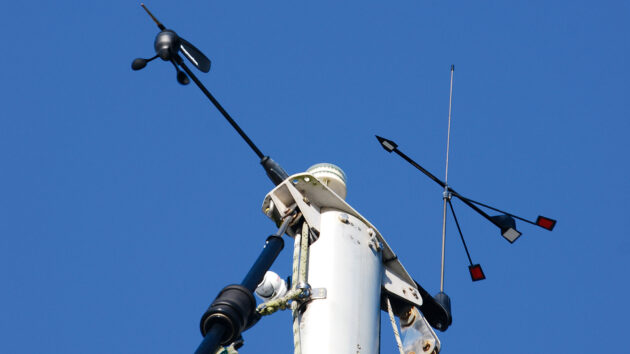
Make sure the wind direction indicator and anemometer are undamaged and spin freely
If your anemometer isn’t spinning and others are, something is wrong. It may just need a clean but bearings are often replaceable at a third of the cost of a new unit. If it looks like everyone else’s, leave it at that. Finally, check the damping levels.
You want your gusts to register as they go through, but not be changing speed by a few knots at a time in normal use. You’ll find calibration settings for your device in your plotter’s Device List usually in the Communications or Network menus under NMEA 2000.
Wind Direction
Next, check the direction pointer moves freely and is quicker than your windex. When your boat is moored up also check its relative direction against your wind instrument(s). They should be aligned but if not, you need to adjust it. Calibration varies by manufacturer but most offer a simple heading offset.
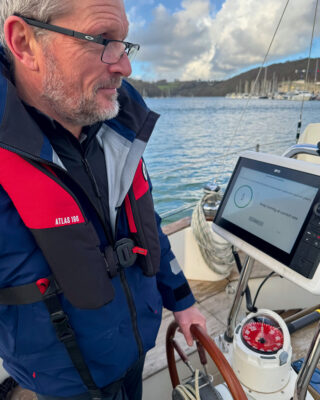
The easiest way if you can’t get to the top of the mast, is to motor at pace directly into the wind (put your main up, it can help) and use the wind offset function to make the needle point directly over the bow. More complex systems may ask you to sail in a circle or on opposite tacks. If yours asks you to tack, make sure your boat is set up identically on both sides as it will take the middle of the two tacks as dead ahead.
Motoring head to wind in readiness to apply wind sensor angle offset. Some setup wizards will ask you to sail on one tack and then the other to work out any discrepancy, so make sure the boat is set identically on both tacks
Heading sensor
Our autopilot, chartplotter and radar rely more often on our heading sensor than we do. To be accurate it needs to create its own deviation table to factor in any local magnetic influences around it. Once it’s worked that out, it needs to know how it’s been aligned within the boat, so the reading may need to be offset slightly.
Calibrate
Most modern systems can be left to self-calibrate, but I think it is better to go through the calibration process and then ‘lock’ it, which they allow you to do. As an aside, if you haven’t had your magnetic steering compass adjusted professionally and you go out of the sight of land, I would strongly recommend getting it done. Even if you lose absolutely everything else, being able to confidently head in the right direction has much of the problem solved.
But back to our electronic compasses. Calibration is usually straightforward. Pick a calm and quiet day away from moorings and any magnetic anomalies (check the chart) and follow your sensor’s calibration wizard (the set of steps it or your manual asks you to follow).
It will likely have you conduct a number of slow circles whilst under motor as it makes some clever comparisons and will guide you through the process. You may need to adjust the reading a few degrees so it’s aligned to the boat. Once you’re finished, check with a hand-bearing compass.
Following the calibration wizard to sort out the wind sensor. Calibrating the compass also has you heading in circles
Compare (often)
Do make it a habit of cross-referencing your magnetic compass and heading sensor. Just don’t do it when your boat is out of the water as boat cradle arms and reinforced concrete can make them deviate wildly.
At sea, a sure giveaway that something is wrong is if your radar picture doesn’t match the land when overlayed on your chart. If it doesn’t match, have a look around the sensor first; a food tin or tools stowed in the wrong locker can be enough to throw it out significantly.
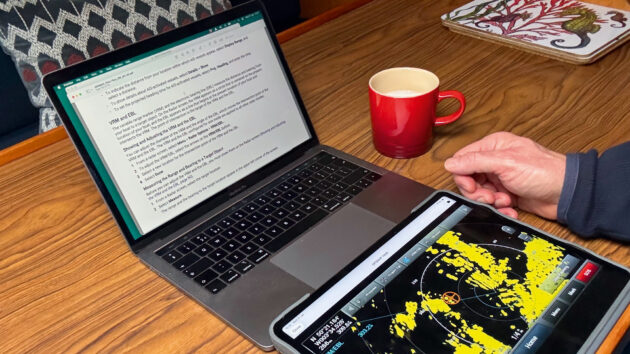
Use screen-mirroring (here with Garmin ActiveCaptain) to look at a working radar screen whilst reading instructions in comfort
Screen setup – Usability
Have a think about what frustrated you last year about your chartplotter and instrument screens. Was it their location, a function or setting you couldn’t find, or the data just wasn’t on the right screen(s)? Ideally, you want to set things up so you can see your plotter from where you need to; it shows you the right things, at the right time, and will do it with the fewest button presses.
Setting things up how you ultimately want them isn’t a 10-minute job and may take a few goes to get right. The worst time to do this is when you are day sailing, so take some time and try and do it beforehand.
What information you want to see where will be personal to you, but having the same information displayed in the same place is helpful if you switch between screens. Ideally, don’t put similar numbers next to each other like speed and depth as it’s easy to confuse the two at a glance.
Combined screens are a great way to mix the information you want but I find I only need a few. Often, less is more, so set up a few pages and make sure they are in ‘Favourites’ or on the first screen. It’s also worth spending time pre-season getting to know the various ‘spaces’ or modes for things like anchoring or tides.
B&G’s Triton Edge sailing processor allows more detailed calibration – even from your phone. Or you can keep it simple with target angles
B&G’s Sailsteer and Raymarine’s Sailing Page really are a masterclass in combining and displaying useful information, but they require some time and effort to understand. If you are going to spend a while getting to know your plotter, mirror (repeat) your plotter screen to your tablet in the companion app so you can do it comfortably down below with a hot cup of tea in hand.
User settings and preferences – Boat data and alarms
Is your boat data such as height, length and draught correct, both in your plotter screen and in your AIS if this is separate? Check your GNSS (satnav) datum and your receiver location offset, if you have them. Check your alarm settings and make them useful. AIS collision alarm distance can often be set too far away, making it quite useless in crowded areas.
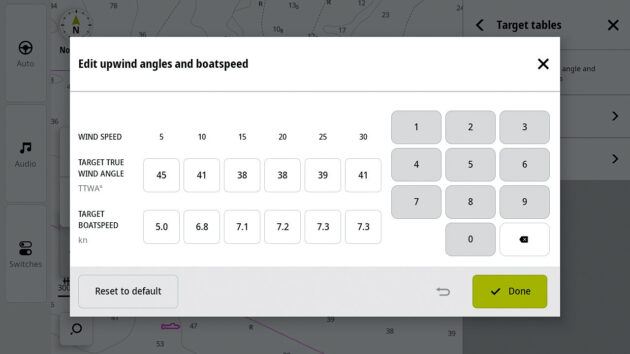
Check your preference screens and if you use auto route, check your routing tolerances and speed. Also have a look at your boat’s Polars (the expected boat speed for any given wind angle and strength). There are usually both simplified and detailed versions you can use.
Even if you don’t go racing, target angles are great for lay-lines and the target speed function will quickly tell you if your sails aren’t set properly. Refine your speeds throughout the season but don’t be a slave to the numbers; they are a reasonable guide at best. How to create a set of polars is another article in itself, but many MFDs now offer preset lists in which to find your boat, or ways of creating and updating your own polars.
Chart settings
Run through your vector chart display settings and make sure you haven’t inadvertently left some features turned off and you like the chosen thresholds for depth shading etc. Play with your settings and see what you like. Some have a ‘reset-to-default’ button, but the settings are easily worked through if you’ve made a mess.
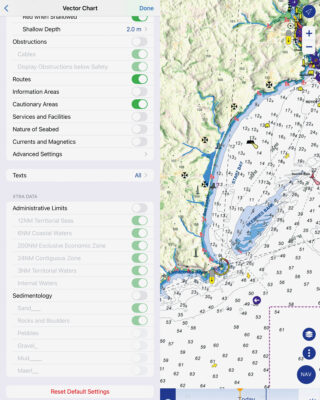
Work through the data you want shown on your chart
Other settings
Lastly check your radar and fish finder/sonar settings and preferences if you have them. This is also a good time to refresh your memory on how to adjust or use some of the features, and work though anything else you drew a blank on the last time you used it.
Autopilot
If your autopilot is working as you want it to, there is no need to change any settings. If it’s not quite right, try the user settings first before running through the wizards. These are often hidden but there will be two: a ‘dockside’ wizard to teach the autopilot your steering configuration; and a ‘sea trial’ wizard that tunes the autopilot’s steering inputs to match the characteristics of your boat. If you are going to run the wizards, record all of the settings first in case the wizards fail and your old settings are lost.
Check the autopilot linkages to your rudder stock, and the rudder angle indicator
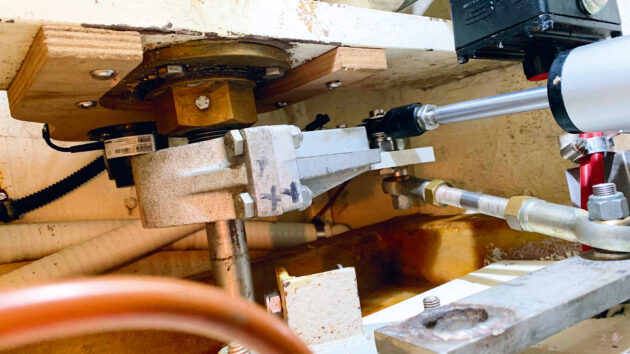
Even if the autopilot is OK, do check your steering system. Steering failure is frustrating at best and can be life-threatening at worse. If you haven’t done so already, trace through all of the autopilot system and confirm everything is secure, moves as expected, and lubricate linkages and fill up hydraulic pump reservoirs as necessary.
Also check the rest of your steering for corrosion and movement. Finally don’t forget to check how your autopilot links to the rudder stock. Some connect through the boat’s steering system but others connect directly and can be used for emergency steering (and may need to be bypassed or disconnected in the event of failure).
Batteries
Last but not least, check your batteries.
All of your electronics rely on them and batteries age. Check they are clean, topped up if necessary and terminals are corrosion- free and tightened correctly. If you haven’t got a clever battery monitoring system, the easiest way to test them is to do a load test. With your lead acid or AGM batteries near full charge, turn on about 10A of load. Leave everything on for about five minutes and then switch everything completely off.
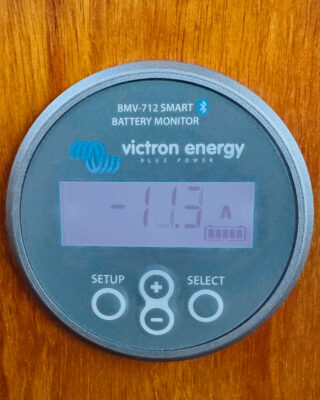
Smart battery monitors will check battery health, but you can do a manual health check too
Your batteries should return close to their original voltage after a few minutes. If they don’t they could be on their way out but they will be naturally sluggish when it’s cold, so perhaps wait until things warm up.
A final note
If you are going to ‘service’ your electronics, the easiest place to start is your user manuals. Unfortunately, the days of just pressing a few buttons and hoping you’ll quickly find what you want are long gone thanks to the mind-boggling array of functions that even basic instruments can offer.
In this article we’ve tried to be as specific as we can where we can, but have had to talk generally for much of it because we just can’t cover every make and model in detail. Fortunately, manufacturers freely provide an impressive selection of user and installation manuals for download, and your local dealer (rather than the manufacturer’s head office) will be best placed to help with advice if you get stuck.
Hopefully, we’ve given you a pointer so you know what you want to do, and in enough detail so what you read will make sense when you apply it to your system.
With thanks to:
The team at Garmin (Europe) Ltd
Ben Meakins – Navico UK Ltd
Richard Marsden – Raymarine UK & Ireland
Enjoyed reading this?

A subscription to Yachting Monthly magazine costs around 40% less than the cover price, so you can save money compared to buying single issues.
Print and digital editions are available through Magazines Direct – where you can also find the latest deals.
YM is packed with information to help you get the most from your time on the water.
-
-
- Take your seamanship to the next level with tips, advice and skills from our experts
- Impartial in-depth reviews of the latest yachts and equipment
- Cruising guides to help you reach those dream destinations
-
Follow us on Facebook, Twitter and Instagram.
Note: We may earn a commission when you buy through links on our site, at no extra cost to you. This doesn’t affect our editorial independence.