


The best mast climbing gear for sailors isn't necessarily anything fancy and marinised with a premium price tag, instead you can pick up the best mast climbing gear from a regular high street store with a climbing department. This buyers guide has all the gear for climbing a mast solo, double handed or fully crewed.
The best mast climbing gear for solo sailors or double handed sailors can be found in some well known high street stores and not necessarily in a chandlery.
This buyers guide curates all the gear you might need with plenty of alternative options to suit individual tastes and needs.
If you are unsure how to climb a mast on your own or with a short handed team of two, then you can read how to do that in my other article explaining in a step by step guide how to climb a mast, using some of the gear in this buyers guide.
Happy climbing!
The basic set up at a glance
DMM Women’s Vixen Harness – Buy now from GoOutdoors.co.uk
Petzl Ascension Ascender – Buy Petzl Ascension left handed from GoOutdoors.co.uk
Petzl Gri Gri + – Buy GriGriplus from Decathlon
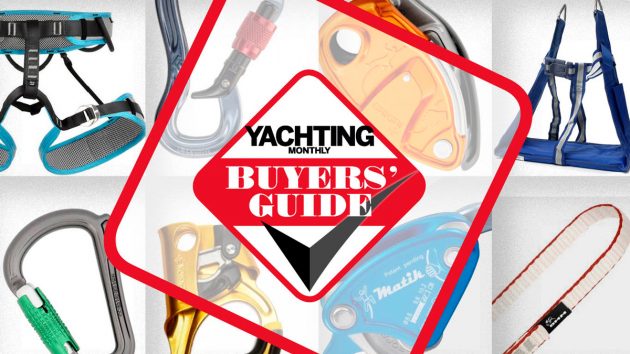
Best Mast climbing gear: Essential buyer’s guide
Harnesses and Bosun’s Chairs

DMM Women’s Vixen Harness
Reasons to Buy: Light weight, easy to stow, custom fit and secure
Reasons to Avoid: Can cut off circulation to legs if hanging around a long time
This is the harness I used in the video. It is designed for women. I’ve used it for about 8 years and it is still in great condition. It comes in sizes XS to L. I bought the L to fit over my foulies or larger clothes, but it is a little big when wearing just light form fitting clothes. Ideally I would get a smaller sized harness for that purpose.
Specifications
• 5 gear loops
• breathable
• 345g (xs) – 410g (large)

Beal Venus
Reasons to Buy: Light weight, easy to stow, custom fit and secure
Reasons to Avoid: Can cut off circulation to legs if hanging around a long time
The Beal harness, which is designed for high level climbing is my second harness for use when I am not wearing full foulies. It fits comfortably over shorts or leggings. The soft fit feels snug and comfortable around my hips and thighs and the harness has a good number of gear loops to clips bits and bobs to. It has a double ziplock fastening and is a little lighter weight than the DMM harness above. The leg loops are nicely adjustable to avoid pinch too.
Specifications
• 4 gear loops
• breathable
• 321g (size 1 – waist 61-76cm, thigh 45-57cm)
• 358g (size 2 – waist 75-90cm, thigh 54-66cm)
Note: We may earn a commission when you buy through links on our site, at no extra cost to you. This doesn’t affect our editorial independence. Where indicated, items have been tested independently of manufacturers influence.

PETZL Adjama Harness
Reasons to Buy: Light weigtht, easy to stow, custom fit and secure
Reasons to Avoid: Can cut off circulation to legs if hanging around a long time
Leg loops adjustable with doubleback buckles, to adapt to different body types and to seasonal clothing. Capacity to carry large amount of gear.
Specifications
• 5 gear loops
• 460g (s) – 545g (large)

Lalizas Bosun’s Chair
Reasons to Buy: comfortable for lengthy spells working up a mast, built in tool stowage, can be used in conjunction with a harness
Reasons to Avoid: smaller users might find the metal triangles can hit their chest, not as secure as a dedicated harness
Rigid seat, basic bosun’s chair from Lalizas as seen on many boats around the world. I have used this one a lot. The only niggle I have with it is the hard metal triangles used for attaching to the halyard have bruised the middle of my chest when they push back while working aloft. I make sure I wear good padding when I use it now, and this may not affect taller people. I keep using it because the hard seat suits me and it’s better than a wooden plank with carpet stapled to it. Combine this with a harness when working aloft on a lengthy job.
Specifications
• tool pockets and loops
• rigid seat
• no frills but does the job

Lalizas Professional Bosun’s Chair
Reasons to Buy: comfortable for lengthy spells working up a mast, built in tool stowage
Reasons to Avoid: smaller people might feel a bit too enclosed in this larger seat
A comfortable bosun’s chair with secure back to avoid slipping through. Good tool storage onboard and tool loops. I’ve used this one on various boats over the years including in the opening picture to this article. It always inspires confidence and comfort.
Specifications
• Used by many professional riggers
• Comfortable for lengthy spells
• Lots of tool storage
Buy Lalizas Professional Bosun’s Chair from Bataeu Plus via Amazon.co.uk
Ascenders

Petzl Ascension Ascender
Reasons to Buy: good for use on most boats using up to 13mm halyards
Reasons to Avoid: if you have halyards larger than 13mm this wont fit
This is the ascender I use on my own climbing gear. I use a left handed version because I am right hand dominant and it’s easier for me to slide the ascender up with my left hand while pulling up on the lazy line with my right hand.
Specifications
• line size: 8mm – 13mm
• 165g
• left or right handed versions
Buy Petzl Ascension from Amazon.com

Climbing Technology Quick Up+ Ascender
Reasons to Buy: good for use on most boats using up to 13mm halyards, two seperate holes for gear and lanyards on the bottom keeps gear organised
Reasons to Avoid: if you have halyards larger than 13mm this wont fit
The easy-to-use Quick Up+ ascender from Climbing Technology comes with an ergonomic, glove-friendly grip that makes it a solid option for fixed-rope ascents.
Specifications
• line size: 8mm – 13mm
• 215g
• left or right hand versions
Buy CT Quickup Ascender from AlpineTrek.co.uk
Belay Devices

Petzl GriGri+
Reasons to Buy: enables a smooth controlled descent and easy to take up slack when climbing, easy to use
Reasons to Avoid: a little pricey for some, involves moving part so you need to ensure you use it correctly to avoid damage
This belay device can be used with all single ropes (optimised for 8.9 to 10.5 mm diameter ropes) and is equipped with an assisted breaking function. Suitable for beginner mast climbers to expert riggers.
Specifications
• line size: 8.9mm – 10.5mm
• 200g
• auto-locking
Buy GriGriplus from Amazon.com

Matik belay
Reasons to Buy: enables a smooth controlled descent and easy to take up slack when climbing
Reasons to Avoid: a little pricey, if you prefer to side feed you may want the other style of belay device
This works in a similar way to the GriGri but the line feeds in a straight line rather than from the side. Some people prefer this to avoid their lines becoming twisted.
• line size: 8.6mm to 10.2mm
• 276g
• antipanic auto clutch engagement
Buy Matik Belay from Amazon.com

Petzl Reverso
Reasons to Buy: enables a smooth controlled descent, simple device with very little to go wrong
Reasons to Avoid: requires a little more skill to use
No moving parts, the Petzle Reverso is a simple belay device that can be more easily put on or taken off a line as you go. You push a bight of rope through one of the apertures and clip a carabiner through to act as the friction turn. A really handy bit of a kit.
Specifications
• line size 8.5mm to 10.5mm
• 57g
• very simple device with little to go wrong.
Buy Petzl Reverso from Amazon.com
Carabiners

Grivel Mega K6N Screw Lock Snap Hook
Reasons to Buy: You need several carabiners to rappel, good value for money
Reasons to Avoid: Don’t use in places where cross loading might be likely
For belaying and rappelling. It is designed for use with both single and double ropes.
I use two of these in my solo mast climb gear. One is used from the bottom of the ascender to hold the footloop and personal lanyard and the other is used on the top of the ascender to work as a reduction turning point for the belay lazy line.
Specifications
• 7000-series aluminum
• Screwgate
• 78g
Buy Grivel K4n Carabiner from Trek Inn

Black Diamond Gridlock Screwgate Carabiner
Reasons to Buy: use these in areas where cross loading is likely to happen, easy to use
Reasons to Avoid: they don’t fit on to the ascender as easily as some others
Designed specifically for belaying, the GridLock isolates the belay loop behind its uniquely shaped gate, thereby keeping the carabiner in its proper orientation.
I use two of these carabiners, both from my harness. The anti-crossloading design is reassuring as the repeated loading and unloading of both the belay and ascender has a tendency to make standard carabiners rotate and there’s a high risk of crossloading when solo rappelling.
Specifications
• Anti cross load design
• 76g
Buy Black Diamond Gridlock from GoOutdoors.co.uk

DMM – Rhino Quicklock – Locking carabiner
Reasons to Buy: anti crossloading horn can be useful, some love the twist lock feature of the gate
Reasons to Avoid: the twist lock gate might not suit some people
For regular users of pulleys or GriGri like belay devices.
I use this carabiner on my prusik line. The horn stops the hitched on line sliding around the carabiner as it is repeatedly adjusted.
Specifications
• Anti cross load horn
• Quicklock gate
• 81g
Buy DMM Rhino from Alpine Trek.co.uk
Slings and quickdraws

DMM Dyneema sling
Reasons to Buy: basic lanyard, nothing to go wrong
Reasons to Avoid: some might find they need a greater degree of adjustment
Dyneema has several advantages over traditional nylon webbing – it’s incredibly light and strong, less susceptible to UV degradation and is more abrasion resistant.
I use this sling as my personal lanyard between harness carabiner and the ascender. You need to find a sling that can be adjusted to your own personal reach length. I double this one over to give me the correct length.
Specifications
• 11mm Dyneema tape
• 120cm
• Strength: 22kN
Buy DMM Dyneema sling from GOOutdoors.co.uk

Multi Chain Evo Daisychain
Reasons to Buy: gives a greater degree of adjustment than a simple sling, easy to use
Reasons to Avoid: Costs more than a simple sling
A daisy chain is a versatile alternative to the above single sling option. You can use this to adjust lengths for multiple applications, which might be ideal if more than one of you will be using it to climb the rig, especially if you’re notably different heights. Obviously there’s a cost implication as it’s four times the costs a basic dyneema sling.
Specifications
• 90g
• Tensile strength: 24 kN
• Dyeema loops
Buy Multi Chain Evo from AlpineTrek.co.uk

Beal Nylon Sling
Reasons to Buy: a budget way to get a good quality footloop, can be used for a multitude of other tasks
Reasons to Avoid: some prefer a rigid foot section to their footloop, not as easy to adjust as a dedicated footloop
A basic Nylon loop, ideal for use on a multitude of climbing uses, I personally use this as my footloop. I have two of them. They are cow-hitched onto the bottom of my ascender, one is tucked away and the other used for climbing. When I reach working height I use the second loop to stand up with both feet or to wrap one around the mast. It’s very handy to have two of these.
Specifications
• length 120cm
• width 16mm
Buy Beal Nylon Sling from GoOutdoors.co.uk

PETZL – Footape – Foot loop sling
Reasons to Buy: Adjustable footloop with a decent foot spreader to avoid your foot being squashed under tension
Reasons to Avoid: a bit more pricey than a basic loop, designed solely as a footloop so not suitable for other jobs
Specifications
• 65g – 20mm webbing
• Minimum length 84cm
• Maximum length 125cm
Buy Petzl Foot loop sling from AlpineTrek.co.uk

Black Diamond Quickdraw
Reasons to Buy: really handy for carrying kit or gear aloft, useful for tethering yourself in place to hold you while you work
Reasons to Avoid: none
Wire gate and solid gate carabiners. quick and easy to clip to a harness and then to secure tools, gear, or yourself to a solid point while you work at height.
Specifications
• 103g
• 12cm sling
Buy Black Diamond Quick Draw from Decathlon

DMM Quickdraw Shadow
Reasons to Buy: really handy for carrying kit or gear aloft, useful for tethering yourself in place to hold you while you work
Reasons to Avoid: none
Two solid gates on an 18cm sling. Quickdraws comes in a variety of wire and solid gate styles with a variety of sling lengths. You can buy them in multipacks or individually.
Specifications
• 113g
• 18cm sling
Buy DMM Shadow quickdraw from GoOutdoors
How to climb a mast: Step by step guide
Don’t forget to use your own judgement when following our advice, or use a professional. Here’s our full disclaimer.
Further reading on mast climbing methods and equipment
How to climb a mast safely at sea – masterclass with Pip Hare
Mast Climbing for short handed crews
What happens when you dismast in the antarctic
Enjoyed reading Climbing a mast – best climbing gear & practical guide?
A subscription to Yachting Monthly magazine costs around 40% less than the cover price.
Print and digital editions are available through Magazines Direct – where you can also find the latest deals.
YM is packed with information to help you get the most from your time on the water.
- Take your seamanship to the next level with tips, advice and skills from our experts
- Impartial in-depth reviews of the latest yachts and equipment
- Cruising guides to help you reach those dream destinations