


Sails stretch over time and can seriously impact the performance and handling of your boat. Paul Lees tells Theo Stocker how to make do with old sails, and when it’s time to bite the bullet
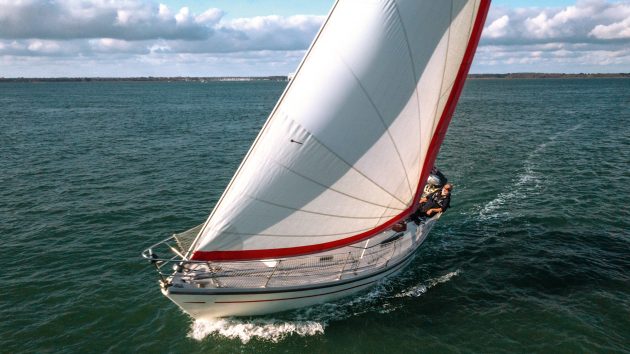
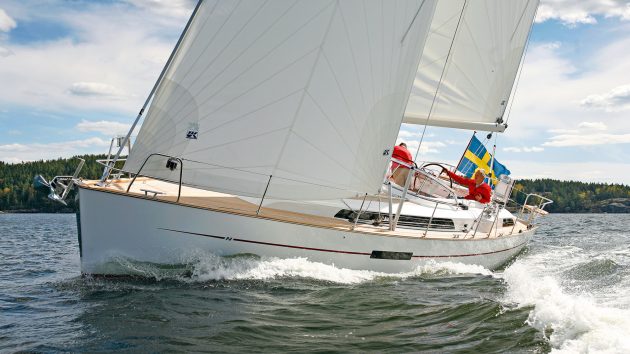
Having owned my 1984 Sadler 29, Pasque, for four years, and cruising with family and, more recently, small children on board, we began to get to know her foibles. She likes to heel a fair amount, readily going to 25º or even 30º of heel by the time she’s powered up; she makes a moderate amount of leeway, and she develops quite heavy weather helm unless the main is reefed very early.
With a modest beam and an unbalanced, skeg-hung rudder, some of this down to the late 1970s design, but it’s unfair to blame many of her quirks on her lines. The sails, though mechanically still perfectly sound, with no rips or tears, were of an unknown age and were starting to look very baggy, with a lot of belly, and stretches in some odd places.
I am no expert on sails, however, so I asked Paul Lees of Crusader Sails in Poole for a professional opinion, and to see what he could suggest to improve how the boat sails and handles with her current canvas.
Ultimately, I was beginning to think that it might be time for me to take the plunge and get new sails, but it would certainly help if I could make the current ones last another season or two.
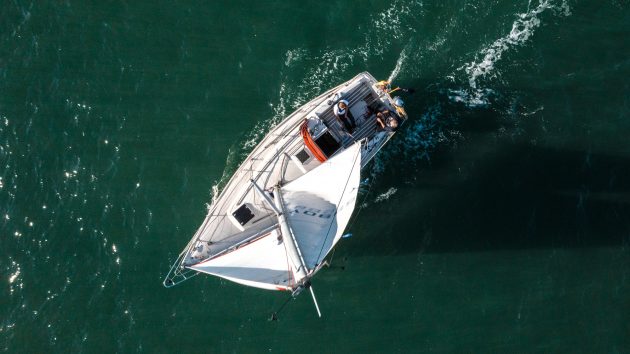
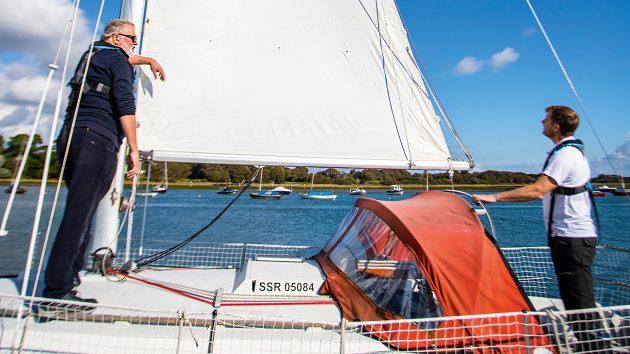
Having slipped out of Lymington on a warm October day, we were rewarded with a consistent Force 3, just about perfect conditions for focusing on what the sails were doing.
Handing the helm to Paul, the first thing he noticed was the large amount of weather helm he was having to apply to keep the boat tracking straight. He quickly attributed this to our sail setting, specifically to oversheeting both the mainsail and genoa to stop them luffing and to try and point as close to the wind as possible. By oversheeting the genoa, we were exacerbating the issue by closing the slot between the headsail and the main, backwinding the mainsail.
Set the genoa car so when sheeted in, both upper and lower tell-tales fly parallel. Photo: Richard Langdon
Sorting the sail trim
Paul set about correcting our sail trim as a first step. I was expecting some black-magic tweaking of halyards, cars and sheets, but the advice he gave was alarmingly simple: ‘Treat both sails as one single aerofoil. Trim the front of the front sail and the back of the back sail.’
In other words, prioritise the luff of the headsail, looking at the genoa tell-tales, and the leech of the mainsail, again aiming to get the tell-tales flying most of the time. If this means you get a badly luffing main, then so be it.
The mainsail is old and baggy, and I had been making the mistake of sheeting in to stop it luffing and backwinding. By the time the main was sheeted in enough to set the luff, the leech was stalling, ruining the whole aerofoil of the boat’s sailplan. The effect of this over-sheeting was much more weather helm and a little more heeling, and consequently more drag and a slower boat. ‘The slower we go, the more weather helm I’m picking up,’ explained Paul.
Easing the main until the leech tell-tales were flying correctly increased boat speed by almost a knot from 3.9 knots to 4.5-4.7 knots, while reducing the helm required by 5º.
Ease out the mainsheet until the leech tell-tales stream out most of the time. Photo: Richard Langdon
The increased boat speed, coupled with a more upright angle of attack, also helps the keel foil work more efficiently, reducing leeway. All of this was achieved without sacrificing any pointing height to windward, with the genoa tell-tales flying fair. More importantly, it was all done without taking scissors to my sails and without denting the boat budget.
Stretch test under way
While out on the water, we decided to check how much the sails were stretching, and how the shape changed under load. We did this by sailing upwind and setting
the sails accordingly. We then bore away onto a very deep reach, but without easing the sails.
Sail downwind and note the distance off the rigging and the shape of the draught stripe. Photo: Richard Langdon
On this course, the sails were full, but under very little strain. We made note of a few reference points: the shape of the camber lines, the shape of the leech, the proximity of the genoa’s leech and foot to fixed points at the spreaders, shroud bases and over the guard wires.
We then headed back upwind without touching the sail-setting. The apparent wind built and the load on the sails rose rapidly. As it did so, the sails visibly ballooned, stretching not a few millimetres, but centimetres, in every dimension. The sails grew visibly deeper with far more belly, and the maximum draught shifted from a desirable one-third aft from the luff, to more than half way aft towards the leech.

Back on the wind, compare how the sail changes shape once loaded up. Photo: Richard Langdon
There are a number of things you can do to flatten both sails and bring the draught back forwards whilst under way. Firstly, wind on some more halyard tension. In theory, you want just enough halyard tension to remove any horizontal creases from the luff, but to drag the draught forward you may need more than this. If you get vertical creases in the luff, ease a bit of halyard back out.
Outhaul tension will help flatten the main, which might be useful, but it’s not going to move the draught. Finally, inducing some mast bend with either backstay tension
(or forward lowers/baby stay tension) will help flatten the luff of the sail, though it will also open up the leech.
Dyneema sheets and soft shackles minimise stretch compared to polyester braid. Photo: Richard Langdon
Halyards and sheets
If you’re thinking your sails might need some attention, have a look at your running rigging first. These are likely to be subject to at least as much stretch as your sails,
if not more, especially if they are ageing braid-on-braid polyester ropes.
My boat had been recently fitted with new Dyneema sheets, so we were confident that these were not contributing to any of the stretch witnessed. The halyard, however, was another matter. My halyard from clutch to headboard was roughly 12m (40ft) and stretch over this length can be several inches or more. This is equivalent to letting your halyard off in the gusts, effectively slackening off the luff, inducing more depth and allowing the belly to move further aft.
You want a flatter sail in stronger winds, but halyard stretch gives you exactly the opposite, increasing drag and heeling moment when you least want it. If you want a demonstration of this, set the main in harbour with no wind in the sails. Tension the halyard as you would normally, then sheet the main in hard, as if you were sailing to windward.
Sheet the main on hard and watch the luff go slack as the halyard stretches. Photo: Richard Langdon
The leech will be extremely tight, transferring all the load from the mainsheet to the halyard via the headboard (which is why the headboard should have its own runners or slugs in the mast track). In contrast, the luff of the sail will have no load on it. There will be plenty of slack shown by horizontal creases and bulges.
Stretch checks in harbour
The art of the sailmaker is to balance the stretch characteristics of each panel of cloth in a sail to work with each other with as little deformation as possible. This is complicated by the need to align multiple pieces of cloth across a triangular shape with three dimensional curves. If the loads in two pieces of cloth next to each are at different angles to the warp of the cloth, they may stretch at different rates, inducing bulges and wrinkles, whether it’s a radial or a cross-cut sail.
Taking a step back, Paul judged the overall shape of the old bi-radial genoa to be ‘not too bad’, even though on closer inspection, along some of the joins, where adjacent panels were on more bias than the one next to it, the sail bulged out against a straight cut panel next to it.

The wrinkles between panels indicate the deformation we saw under load. Photo: Richard Langdon
The main had a very full shape, and to test whether this was due to the state of the cloth, or the cut of the sail, we hoisted the main and sheeted it in to fill it with wind.
It had a smooth curve with few obvious bulges, tears or other signs of wear. However, when Paul pushed a finger into the sail, a large dent was made that took more than a few seconds to pull back into shape. This was purely down to the stretchiness of the cloth, and pointed to the issues we had found out on the water.
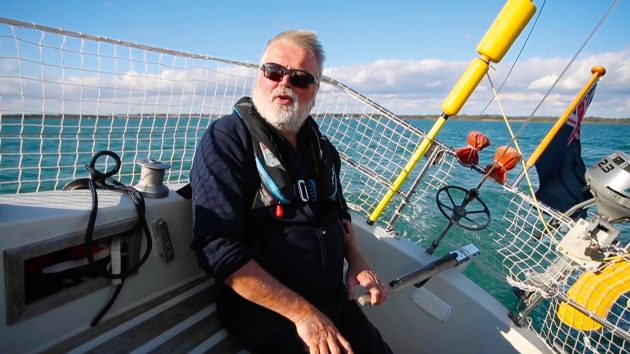
Having got the boat balanced with just a degree or two of weather helm. Photo: Richard Langdon
Weather helm
Having a heavy helm is not the same as weather helm itself, though they are easily confused. Weather helm is the angle of helm you have to apply to keep a boat sailing straight.
On some boats with well-balanced rudders, you could have a large amount of weather helm, up to 30º or more, and the tiller or wheel not feel that heavy, while on a boat with an unbalanced rudder, even just a few degrees of weather helm might feel very heavy. This would particularly be the case on old boats with keel-hung rudders, where the axis of the rudder is raked forward at an acute angle; with the boat heeled, pulling the helm to windward, and the rudder down to leeward is in effect trying to lift the aft end of the boat out of the water, pushing against the bow. It’s no surprise that it feels heavy.
Some weather helm is acceptable or even desirable (reckoned by designers to be between 2º-5º of rudder angle) but only in so far as the laminar water flow remains attached to the windward side of the rudder, which allows the rudder to create lift to windward, helping reduce leeway. Any less than this and you risk lee-helm, more than this and you are creating drag, and overloading steering components.
On large, overlapping headsails, a smaller sail can make the boat faster with less drag, less heel and more lift, as well as raising the clew for better visibility. Photo: Richard Langdon
Recutting
It became obvious that there was more stretch in the sails than could be easily dealt with by judicious sail trim, particularly in windy conditions. The effect was exactly the opposite to what you would want.
In gusts, when a flatter shape is needed, the belly increases and creates more lift and heel. The cord of the sail’s aerofoil gets longer, coupled with a more uneven shape, creating more drag.
Sails can be recut to reduce the amount of belly in the sail, as flatter panels will help eliminate the static stretch, or ‘growth’. This will help to some extent.
What it can’t counteract is the stretch now intrinsic to the sails – they will deform under load; it’s just that they will be doing so from a better starting point. Recutting old cross-cut sails is a realistic prospect. Doing so for bi- or tri-radial cut sails will be difficult given the complexity of the panels that go into them, and while these sails should last longer thanks to the better alignment of the cloth with the loads in the sail, getting more life out of them by recutting is much harder.
The shape of the sail is created by the slight curve of each panel along its seams
Buying new sails
At what point is replacing your sails the right thing to do? Mechanically, they may not be worn out. Made from old and stretchy materials, and built in an old-fashioned way as they are, you can sail the boat with these sails.
Anyone even vaguely interested in performance for faster passages and more comfortable sailing would be amazed at the advances that have been made in sail construction over the last few decades. There are both speed and handling advantages with moving to a new suit of sails, as well as reducing weather helm, heel and leeway.
Paul recommended that the new genoa be cut to 135% overlap, which is 11% narrower than the old 146% overlap. ‘This has a number of advantages,’ he explained. ‘It is a smaller sail so it rolls away more easily when you need to reduce sail area. It’s a more efficient sail, giving more lift and less drag, so the boat will heel less, and probably point better too.
The other major advantage for the cruising sailor is better visibility, because the clew can be higher and further forward, and saves a lot of time down on the leeward side peering around the sail.’
Warp and fill make up the cloth. Either can be the primary load-bearing fibre
Stretch and sail cloth
Leaving laminate and moulded sails aside, Dacron (polyester) sails are made from woven cloth with a number of characteristics defined by how the cloth is constructed:
Weight – The weight of cloth depends on the size of the yarns used. The thicker they are, the heavier the cloth will be per
square metre.
Warp and fill – Yarns go over and under each other to form the cloth. One of these will generally be straight, while the other will do the up-and-down of going over and under the straight yarn. This is called crimp, and the direction with crimp will have more stretch than the direction without. Cloth can have straight warp (in line with the bolt of cloth) or straight fill (across the cloth). Different cloths might be used in different parts of the sail, so that the straight yarns are as closely aligned with the load paths in the sail, depending on the cut of the sail.
Bias – Load applied on the bias, diagonally across the cloth – aligned with neither warp or fill – will induce far more stretch still. You can demonstrate this by taking a tea-towel, or any square of soft cloth, and testing the stretch along the cloth, across the cloth and diagonally across it, with surprising differences in stretch between the three directions.
Heat treatment – Once woven, the cloth is then heat-treated to compact the fibres together and along itself, shrinking the cloth.
Coating – A coating is applied to lock the fibres together. This is what gives sail cloth its satisfying crinkle.
Stretch – The coating wears away over time, and the fibres grow longer and more stretchy under load. Old sails may still be mechanically functional and hold their original shape when slack, but can stretch out of all recognition in a stiff blow.
A tri-radial sail is constructed with the panels aligned to each corner of the sail
Dacron sail construction
Cross Cut – The most common and least expensive sails are made of cloth used horizontally across the sail with roughly parallel seams, with the cloth running perpendicular to the greatest loads in the sail, which are from clew to head, following the leech. For this reason, the cloth used has a straight fill and a crimped warp to minimise vertical stretch in the sail.
The downside of these sails is that in other areas, such as across the foot or up the luff, the cloth is not optimally aligned with the loads, so that it stretches on the bias or along the warp. For this reason, cross cut sails will lose their shape faster than the alternatives.
Radial Cut – Sails can be cut radially, with cloth panels radiating out from either two or three corners of the sails. These use cloth in which the warp is straight and the fill is crimped. The use of multiple small panels means that the straight warp is aligned with the main loads in each area of the sail.
In practice, this is much harder to achieve, usually requiring computer-aided design and cutting to get a consistent sail shape. Any areas where panels are aligned with different cloth angles are likely to result in creases in the sail.
Enjoyed reading this?

A subscription to Yachting Monthly magazine costs around 40% less than the cover price.
Print and digital editions are available through Magazines Direct – where you can also find the latest deals.
YM is packed with information to help you get the most from your time on the water.
-
-
- Take your seamanship to the next level with tips, advice and skills from our experts
- Impartial in-depth reviews of the latest yachts and equipment
- Cruising guides to help you reach those dream destinations
-
Follow us on Facebook, Twitter and Instagram.