


With an old and leaking steering compass, Theo Stocker finds out how to make sure his is in peak condition

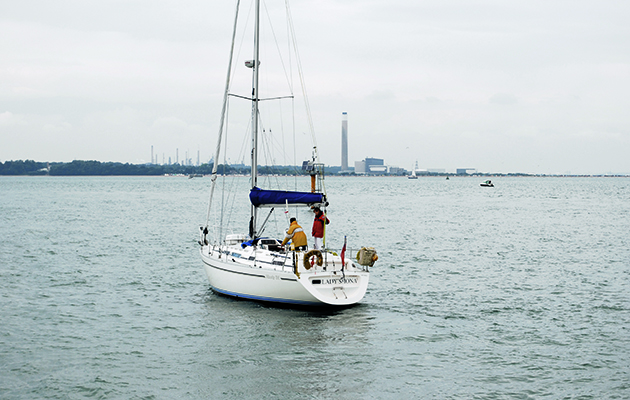
Coming back from Devon this summer, I needed to steer an easterly course to clear the Portland Race, but as the sun emerged from behind the clouds, I realised I could barely see my compass card.
The domes of both of my steering compasses (our boat was fitted with two) where crazed and hazy from UV damage and one of them had sprung a leak so the card moved jerkily rather than smoothly.

Check errors. It is easy to assume your compass error is insignificant, but have you actually checked?
It was, I resolved, time to give my aging Plastimo Contest 100 steering compasses some much needed love and attention.
Restoring an old compass
There are a few things you can do to bring an old and tired compass back to life.
Firstly, the plastic flange around the dome, and the markings for angle of heel, can fade and crack over time.
Squeeze the sides of the flange and pull it off from the bottom.

Difficult to read: Both steering compasses were hazy, leaking fluid and missing marks. It was time for an upgrade
A spray with some black acrylic spray paint may bring it back to life, or a replacement can be bought separately as a spare.
If the dome is hazy, it’s worth giving it a polish.
While some polishes or rubbing compounds such as Brasso might work, specialist polishes for car headlights work best.
Plastimo don’t recommend topping up your compass, as it’s hard to seal a leaking compass.
If you want to give it a go, however, remove a small amount of fluid to see if it’s alcohol mixed with deionised water or oil based.
To tell the difference, mix it with oil water and see if it separates.
If your compass isn’t lit, or the light bulb has gone, have a look at putting in an LED bulb.
These can be wired in separately and are not expensive.
Replacing your compass
Because the leak in one of the compasses was terminal, in the end I decided to replace both of them.
To do this, I chose the model closest to my old ones so that they would fit into exactly the same holes in the bulkhead, in this instance a Plastimo Contest 101 for a vertical mount bulkhead.
If you are fitting a new or additional compass where there was none before, there are some things you’ll need to check.
Firstly, what surface do you want to mount it on – flat, vertical, or sloped?
There are different compasses for each of these.

Illumination: Being able to see the compass at night is important, so make sure the light is working properly. Opt for an LED bulb
Make sure you get one for a sailing yacht too; compasses for powerboats have extra damping against vibration and aren’t designed to cope with large angles of heel.
Where will the compass be read from? If you’ll stand above it, you will want a flat card; if you’re looking at it horizontally, you’ll want one with markings on the side.
Check your location is as far as possible from sources of magnetic deviation too.
Offer up a hand bearing compass with all your electronics switched on to check if the card moves noticeably in that location.
Once it’s in place, make sure it’s aligned properly by measuring from your boat’s centreline to the compass’s lubberline.
Then measure the same distance as far forward in the boat as you can, and check the lubberline is aligned to this.
If it’s not in line, you’ll need to use some packing and sealant to straighten it up.
Is your compass correct?
I must admit, when I bought my boat there was no deviation card, and checking the compasses came pretty far down the to-do list.
They seemed ‘about right’ after all.

Alignment: If the lubber line is not parallel to your centreline, your course will be out. Measure the offset and sight forward. Correct with shims
The good news is that your old compass won’t have got any less accurate over time.
What will have changed, however, is the addition of chartplotters, instrument heads, radios and speakers, all of which can knock your compass significantly off course, particularly if they are within one metre of the compass.
Also, dangling binoculars, phones and other gadgets from your steering binnacle can add significant error.
Be aware of heeling error too.
If your keel is cast iron, as mine is, there’s a chance it could induce compass error.
You can check this by steering toward a fixed object, sheeting out to keep the boat upright, then sheeting in to induce heel, and watching if the compass moves.
Plastimo advise that correction is carried out by a professional, but it’s perfectly doable yourself, with a bit of care.
Quick compass checks
A professional compass adjuster working on a ship will use a tug to swing the stern of the ship around a fixed buoy and compare the steering compass to a series of transits to establish compass deviation.

This isn’t easy to do by yourself in a yacht, but there are simple, if marginally less accurate, ways to check.
You’ll need a hand bearing compass, a notebook, and access to your compass’s correction screws.
In the case of my Contest 101, this is a removable insert that slots beneath the compass, for which I need to remove the surrounding flange.
How to….A quick guide to checking and adjusting your compass
1. Pick a landmark
Find a landmark at least three miles distant. Close to slack water, motor round slowly in a circle, checking the bearing of the object on a hand bearing compass.
If it remains the same, you are free from interference and can proceed with checking your deviation.
Don’t worry about the bearing changing. One degree over one mile is roughly 30m.
At three miles you have 90m either side of your starting point before the compass will move one degree.
If you are six miles distant, you’ll have 180m either side to play with.
As you’re working between two magnetic compasses, you don’t need to worry about magnetic variation.
2. Slow circles
Motor in a slow circle again.
Every 30° of course change, check the bearing of the object and check if the bearing to the landmark has changed.
Make a note of any difference for each bearing.
Repeat the process, turning the boat in the opposite direction to check your observations.
3. Handbearing compass

An alternative to this process is to simply compare your hand bearing compass to your steering compass.
Stand on the centreline and sight the slot in the mast with your hand bearing compass.
Run the boat along a course N, S, E and W and compare the difference to the main compass.
4. Finding deviation
If your compass is accurate within 7º, it’s best to leave it as it is and to draw a deviation card to factor in any error.
If your error is between 7º and 20º, you can correct the error using the compensating magnets or insert, and then repeat the process, drawing a deviation card if necessary.
If the error is more than 20º, it’s time to identify what’s causing the deviation.
5. Correct the error

Compass correction magnets work on the cardinal compass points.
Run the boat on a northerly course by hand bearing compass and then turn the North-South correcting screw until the steering compass points north.
Then steer an easterly course and do the same with the East-West screw.
Next, steer a southerly course.
If there is still deviation, adjust the screw to reduce this error by half.
On a westerly course, again correct the screw to reduce the error by half.
Repeat this process until you have eliminated as much error as possible on all cardinal points.
6. Deviation card

Once you’ve done this, you’ll need to redo your deviation card.
Mark up your compass error every 30º, and then draw a line between each of these points to give you a deviation curve.
You’ll need to take this error into account every time you move from True to Magnetic.