


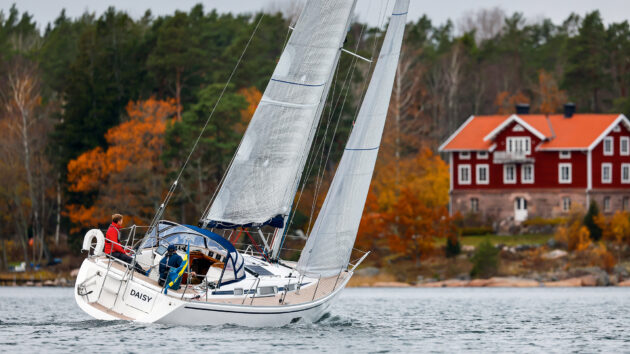
A mental image of your sail’s shape from above will help you trim it for maximum drive
Sails are not flat sheets of fabric but are cut and fabricated so they form a shallow dish shape.
To trim a sail we point the leading edge – the luff – directly into the wind and then pull the trailing corner – the clew – slightly across the wind. This sets up a steady airflow around both the concave (inside) surface and the convex (outside) surface of the sail.

Power isn’t everything…
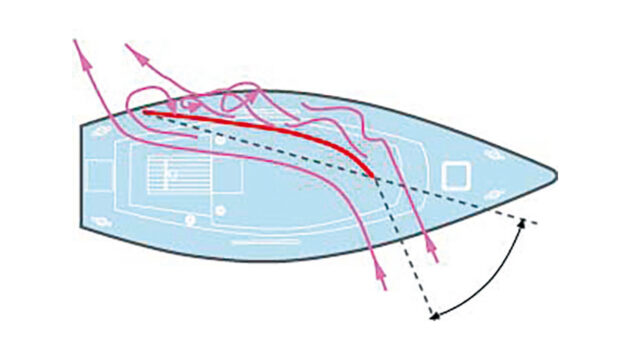
Sail shape physics Diagram 1 (above) shows a boat flying a single mainsail having a nice even curved shape. The coloured arrows represent the forces produced by the pressure difference between the inside and outside of the sail. Because the sail has an even curve the forces are evenly spread.
The green arrows are producing some drive and would like to pull the boat forward, but they are opposed by the yellow arrows wanting to drag it backwards. Their combined force will certainly heel the boat over but, otherwise, it isn’t going anywhere.
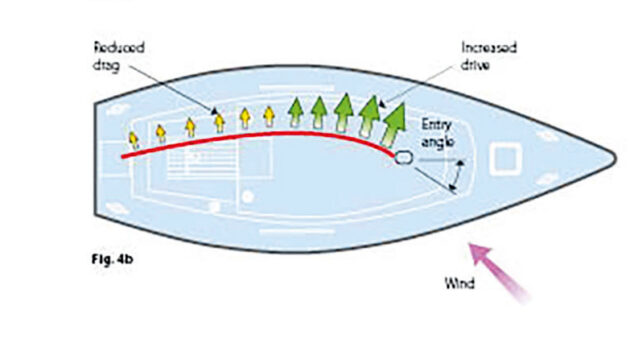
Sail shape physics Diagram 2 (above) shows the same boat but with a sail cut with more curve forward near the mast, and a flatter trailing section. Now you can see that there’s more drive in the leading part of the sail, with the relatively flat trailing section experiencing much less pressure difference and, therefore, producing less drag.
Shape the sails to match entry angle
So, sails must first be cut by the sailmaker so they can take up the right shape, then trimmed by the crew so they work optimally. This will involve trying to shape the sails to match the entry angle to the wind direction while producing as much forward drive as possible.
The entry angle is the angle between the chord of the sail, in plan view, and the wind direction.
Shaping a sail to optimise peformance
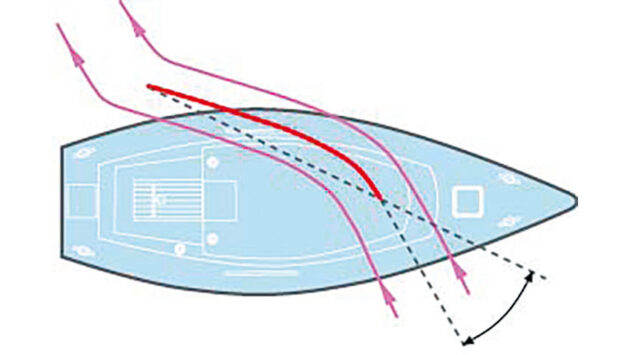
In this diagram the sail’s entry angle is good, with the leading edge pointing directly into the wind. The exit angle is also good. The airflow on both sides of the sail is smooth and attached to the sail’s surface. This sail will provide good drive.
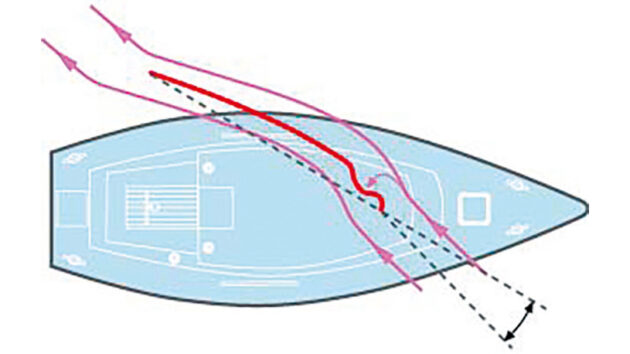
The entry angle here is too small, the leading edge of the sail is flapping (luffing) in the disturbed airflow, and the sail is stalled (not working). It needs to be sheeted in, increasing the entry angle enough to stop the luffing.
This sail is over-sheeted. The entry angle is too large, the flow of air around the outside has become detached and turbulent. It might look OK but without an accelerated flow around the outside surface, the sail isn’t providing drive. The sheet should be eased so the outside flow can reattach.

This shows a full sail in a very light breeze. The airflow around the outside of the sail is simply too weak to remain attached to the surface, has broken away, and become disturbed. The sail should be flattened and the sheet eased so that the flow can re-attach to the outside surface.

This is an authorised extract from…
RYA Sail Trim Handbook for Cruisers. The book has all the information you need to help you understand the many types and materials of sails available and how to select and trim the best for your boat and cruising conditions. You can buy it direct from the www.rya.org.uk
Enjoyed reading this?

A subscription to Yachting Monthly magazine costs around 40% less than the cover price, so you can save money compared to buying single issues.
Print and digital editions are available through Magazines Direct – where you can also find the latest deals.
YM is packed with information to help you get the most from your time on the water.
-
-
- Take your seamanship to the next level with tips, advice and skills from our experts
- Impartial in-depth reviews of the latest yachts and equipment
- Cruising guides to help you reach those dream destinations
-
Follow us on Facebook, Twitter and Instagram.
Note: We may earn a commission when you buy through links on our site, at no extra cost to you. This doesn’t affect our editorial independence.